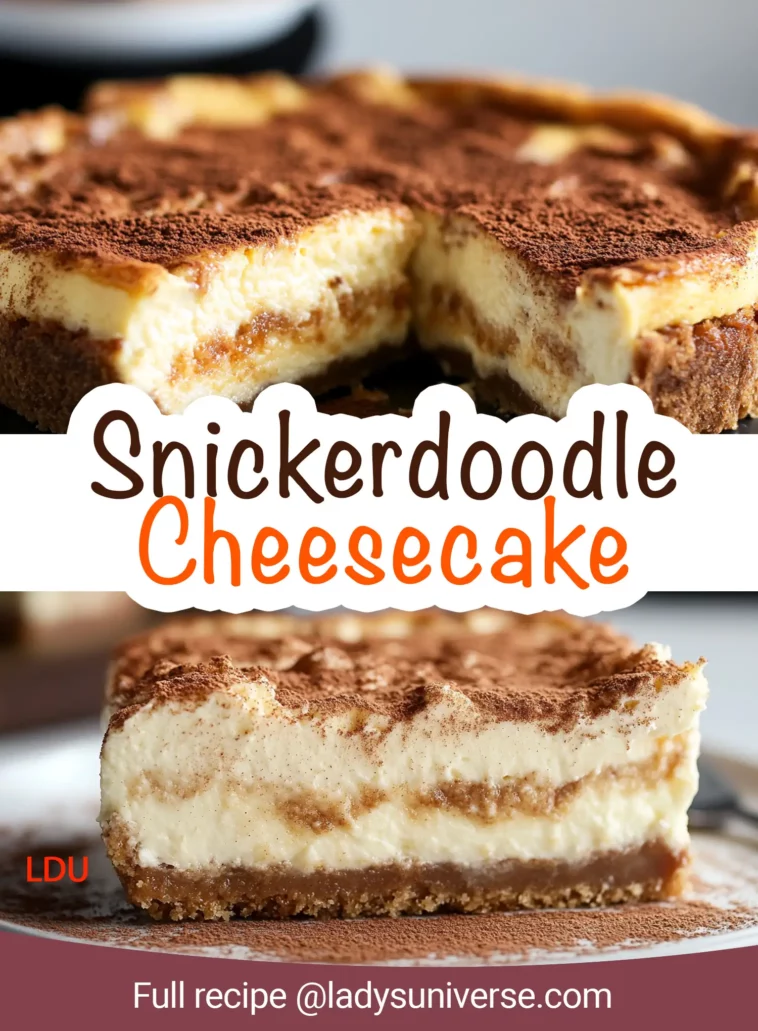
There’s something about the word “snickerdoodle” that brings back memories of cozy kitchens, warm cookies fresh from the oven, and the irresistible aroma of cinnamon and sugar. Now, imagine capturing all that nostalgic goodness and turning it into a decadent dessert that’s sure to wow any crowd. Enter the Snickerdoodle Cheesecake – a dessert that’s part cookie, part cheesecake, and 100% delicious. This recipe combines the best of both worlds: the buttery, cinnamon-kissed flavor of snickerdoodle cookies and the creamy, tangy richness of classic cheesecake. Whether you’re a seasoned baker or just looking for something special to bring to your next gathering, this Snickerdoodle Cheesecake is bound to become a new favorite.
Contents
- 1
- 2 The inspiration for this cheesecake came to me after a weekend of baking snickerdoodle cookies for my family. As the last batch came out of the oven, I began to wonder how those same flavors would taste in a cheesecake. The result? A dessert that’s as comforting as a warm cookie but with the luxurious texture of cheesecake. It’s perfect for the holiday season or any time you want to indulge in something truly special.
- 3
- 4
- 5 Ingredients
- 6 Equipment
- 7
- 8 Instructions
- 9
- 10 Tips & Variations
- 11
- 12 FAQs
- 13
Ingredients
For the Snickerdoodle Crust:
- Snickerdoodle cookie crumbs: 2 cups (about 20 cookies, crushed)
- Unsalted butter: 1/4 cup, melted
For the Cheesecake Filling:
- Cream cheese: 3 packages (8 ounces each), softened
- Granulated sugar: 1 cup
- Large eggs: 3
- Vanilla extract: 2 teaspoons
- Sour cream: 1/2 cup
For the Cinnamon-Sugar Topping:
- Granulated sugar: 1/4 cup
- Ground cinnamon: 1 tablespoon
Equipment
- 9-inch springform pan
- Parchment paper
- Mixing bowls
- Electric mixer or stand mixer
- Spatula
- Knife
Instructions
Prepare the Crust:
- Preheat your oven to 325°F (165°C). Line the bottom of a 9-inch springform pan with parchment paper and lightly grease the sides. This will help the cheesecake release easily from the pan later.
- In a medium bowl, combine the snickerdoodle cookie crumbs and melted butter. Mix until the crumbs are well coated and the texture resembles wet sand.
- Press the mixture firmly into the bottom of the prepared pan to form an even crust. Bake for 10 minutes, then remove from the oven and allow it to cool while you prepare the filling.
Make the Cheesecake Filling:
- In a large mixing bowl, beat the softened cream cheese until smooth and creamy. This step is crucial to avoid lumps in your cheesecake.
- Gradually add the granulated sugar and continue beating until the mixture is well combined and smooth.
- Add the eggs one at a time, beating just until each egg is fully incorporated before adding the next. Overbeating the eggs can cause the cheesecake to crack, so mix gently.
- Stir in the vanilla extract and sour cream, mixing until smooth. The sour cream adds a slight tanginess that balances the sweetness of the cheesecake.
- Pour the cheesecake filling over the cooled crust, using a spatula to smooth the top.
Bake the Cheesecake:
- In a small bowl, mix together the granulated sugar and ground cinnamon for the topping. Sprinkle half of this mixture evenly over the cheesecake filling.
- Place the cheesecake in the preheated oven and bake for 55-60 minutes, or until the center is almost set but still slightly jiggly. The residual heat will continue to cook the cheesecake as it cools.
- Turn off the oven, crack the oven door slightly, and let the cheesecake cool inside for 1 hour. This slow cooling process helps prevent cracks on the surface.
- After an hour, remove the cheesecake from the oven, sprinkle with the remaining cinnamon-sugar mixture, and let it cool completely at room temperature.
Chill:
- Once cooled, refrigerate the cheesecake for at least 4 hours, or overnight, to allow it to fully set and develop its flavors. Patience is key here – a well-chilled cheesecake is much easier to slice and serve.
Serve:
- Before serving, carefully run a knife around the edges of the pan to loosen the cheesecake. Then, release and remove the sides of the springform pan.
- Slice the cheesecake into servings, dipping the knife in hot water and wiping it dry between cuts for clean slices. Serve chilled and enjoy the delightful blend of snickerdoodle cookie and creamy cheesecake in every bite.
Tips & Variations
- For an extra crunchy crust, consider adding a tablespoon of sugar to the cookie crumb mixture before pressing it into the pan.
- If you prefer a thicker crust, use up to 3 cups of snickerdoodle crumbs and increase the butter accordingly.
- Add a drizzle of caramel or a dollop of whipped cream on top before serving for an extra indulgent treat.
- To make this recipe gluten-free, use gluten-free snickerdoodle cookies for the crust.
FAQs
1. Can I make this cheesecake ahead of time? Yes, this cheesecake actually tastes better when made a day ahead. The flavors have time to meld together, and the cheesecake firms up nicely in the fridge.
2. What if I don’t have a springform pan? A springform pan is ideal because it allows you to easily remove the cheesecake without disturbing the crust. If you don’t have one, you can use a regular cake pan, but you’ll need to serve the cheesecake directly from the pan.
3. Can I freeze this cheesecake? Absolutely! After chilling, wrap the cheesecake tightly in plastic wrap and then in aluminum foil. It can be frozen for up to 3 months. Thaw in the refrigerator overnight before serving.
4. Why did my cheesecake crack? Cheesecakes can crack if they’re overbaked, the batter is overmixed, or they cool too quickly. To prevent cracking, follow the instructions carefully, especially the cooling process.
The Snickerdoodle Cheesecake is a dessert that’s sure to impress with its rich flavors and beautiful presentation. Whether you’re serving it for a special occasion or just because, this cheesecake will quickly become a go-to recipe in your dessert repertoire. So go ahead, take a slice, and enjoy the perfect blend of snickerdoodle nostalgia and creamy cheesecake indulgence!


