Contents
by Jamie from ladysuniverse Kitchen
There’s a Swedish word, lagom, that means something like “just the right amount.” The Swedes apparently apply it to everything — coffee, conversation, how long you stay at a party.
Kladdkaka has nothing to do with lagom.
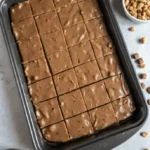
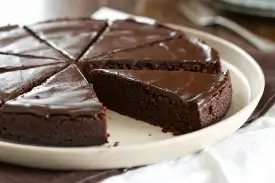
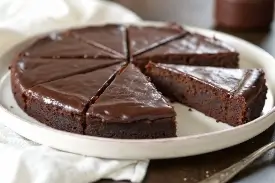
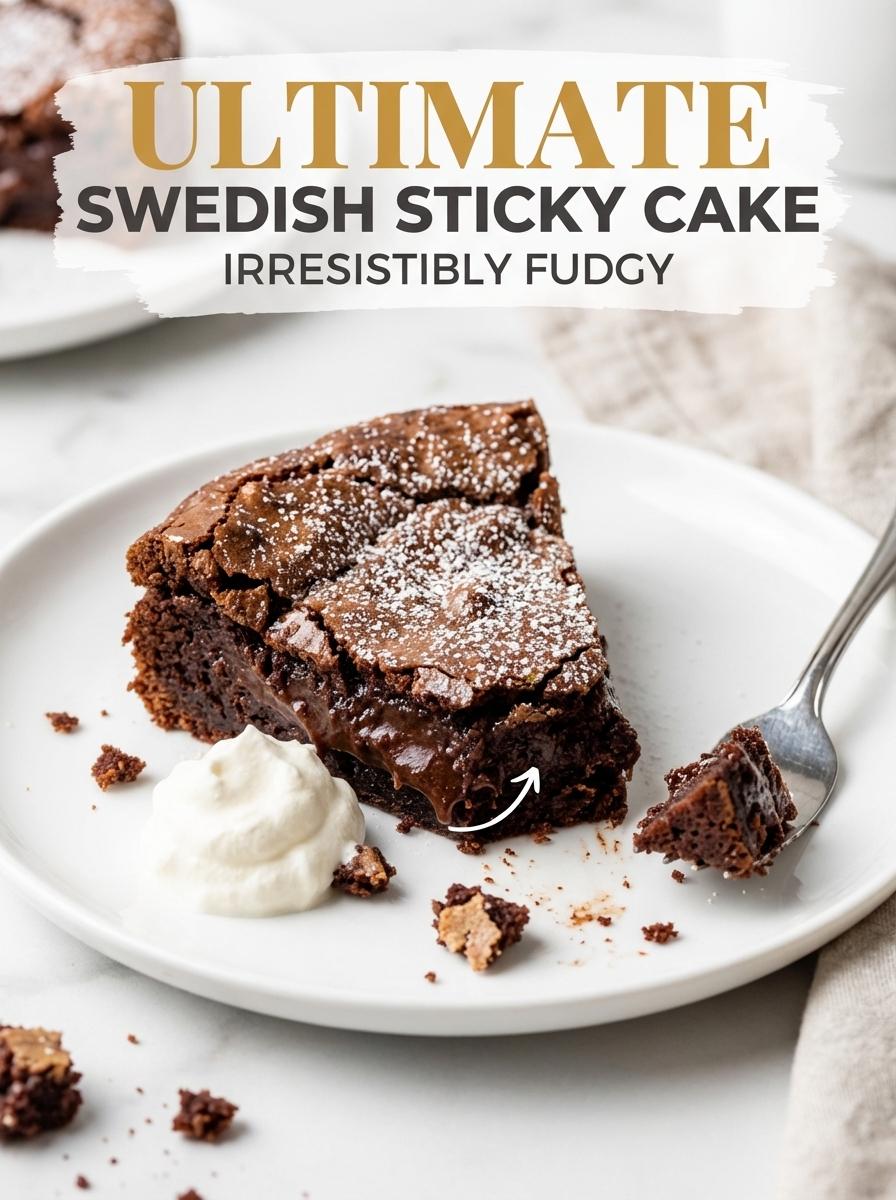
It’s a chocolate cake with a center that doesn’t fully set. On purpose. The name means “sticky cake” and that’s not a cute branding decision, it’s just what the cake is. Dense, dark, just barely held together in the middle, with edges that are slightly crisp and a center that’s basically a very confident chocolate pudding wearing a cake suit.
A friend brought this back into my life after a trip to Stockholm. She described it as “like a brownie but it went further.” I didn’t know what that meant. Then I made it and I understood immediately.
I overbaked my first one because the middle was still wobbling and I panicked. Pulled a second one early and it collapsed on the plate. Third time I just trusted the recipe and stood there and watched the clock and it came out exactly right and I felt unreasonably proud of myself for doing the bare minimum.
Why it works
There’s almost no flour. Like, a third of a cup. For a whole cake. The butter and eggs are doing most of the work, which is why the texture ends up somewhere between fudge and cake rather than actually being either one.
No baking powder, no baking soda. It doesn’t rise. It just sets around the edges and stays soft in the middle, and that softness is the whole point of making it.
Cocoa powder instead of melted chocolate gives you a fudgier, less sweet result. Melted chocolate makes it taste more like a molten lava cake situation — richer, a bit fancy. Cocoa keeps it in “eating this alone on a Tuesday” territory, which I mean as a compliment.
The vanilla sounds optional but it isn’t. Without it the whole thing tastes slightly flat.
Baking time is the only real skill this recipe requires. Twelve to fourteen minutes at a hot oven. The edges set, the center wobbles. That’s done. A toothpick that comes out clean means you’ve made chocolate cake, which is fine, but not what you were going for.
Ingredients
| Ingredient | Amount | Notes |
|---|---|---|
| Butter | 100g / about 7 tablespoons | Melted — let it cool a few minutes before using |
| Sugar | ¾ cup | Regular white sugar |
| Eggs | 2 large | Room temp if possible, cold if you forgot |
| Vanilla extract | 1 teaspoon | Don’t skip this one |
| Cocoa powder | ½ cup | Unsweetened — grocery store cocoa is totally fine here |
| All-purpose flour | ⅓ cup | Yes really, that’s it |
| Salt | A pinch | Just a pinch, the butter usually handles this |
| Powdered sugar | For dusting | Optional, but every photo you’ve seen of this has it |
How to make it
Grease your pan first. 9-inch round, buttered, parchment on the bottom. I skipped the parchment once and the cake came out in chunks that I reassembled on the plate and served anyway. It tasted fine. It looked like something had gone wrong, because something had gone wrong. Parchment is cheap.
Oven to 350°F (175°C) while you put everything together.
Melt the butter and let it sit for a few minutes. If it’s hot when it hits the eggs, you’ll cook them slightly and the batter gets weird. Not dramatically wrong, just off. Let it cool.
Whisk the butter and sugar together in a bowl, then add the eggs and vanilla. Whisk again, not aggressively — you’re not trying to build anything here, just combine things. The batter is going to be thick and very dark and look slightly intimidating. This is normal.
Sift in the cocoa, flour, and salt. Cocoa clumps badly and if you don’t sift it you’ll end up with little pockets of dry bitter cocoa in your cake, which I discovered by eating them and making a face. Fold everything together until you don’t see dry streaks.
Pour into the pan, smooth the top, and put it in the oven.
Bake 12 to 14 minutes. Here’s the thing — when the timer goes off, the center is going to look undone. It is undone. That’s where you want it. The edges should look set and the center should have a visible wobble when you move the pan. Pull it.
Leave it alone for at least 20 minutes. The center sets as it cools and what looked like a disaster becomes exactly right. Do not try to slice it warm. You will regret this.
Dust with powdered sugar before serving. Whipped cream or vanilla ice cream on the side if you want — most Swedish recipes call for this and I’m not going to argue with them.
Tips & storage
- The wobble is your doneness cue, not color or time. Every oven is different so use the wobble.
- Dark or Dutch-process cocoa makes this more intense if you want to go that direction
- Day two is better than day one — the texture gets even more fudgy overnight, which shouldn’t be possible but somehow is
- Don’t refrigerate it unless your kitchen is very warm — cold makes it seize up a bit. Room temperature wrapped in foil is fine for three or four days.
- Raspberries on the side work really well with this — the tartness cuts through it in a way that fresh fruit rarely does for me with chocolate desserts
On leftovers: I’ve started writing the date on the foil in marker, which took me about two years of squinting at mystery containers before I started doing it consistently. Keeps about 3 to 4 days out, longer in the fridge if you don’t mind the firmer texture.
Nutrition (approximate, per slice)
Based on 8 slices, not counting whipped cream.
| Per slice | |
|---|---|
| Calories | ~230 |
| Total fat | 13g |
| Saturated fat | 8g |
| Cholesterol | 75mg |
| Sodium | ~85mg |
| Total carbs | 27g |
| Fiber | 2g |
| Sugars | 20g |
| Protein | 3g |
Will vary a little with butter brand and how heavy-handed you are with the powdered sugar.