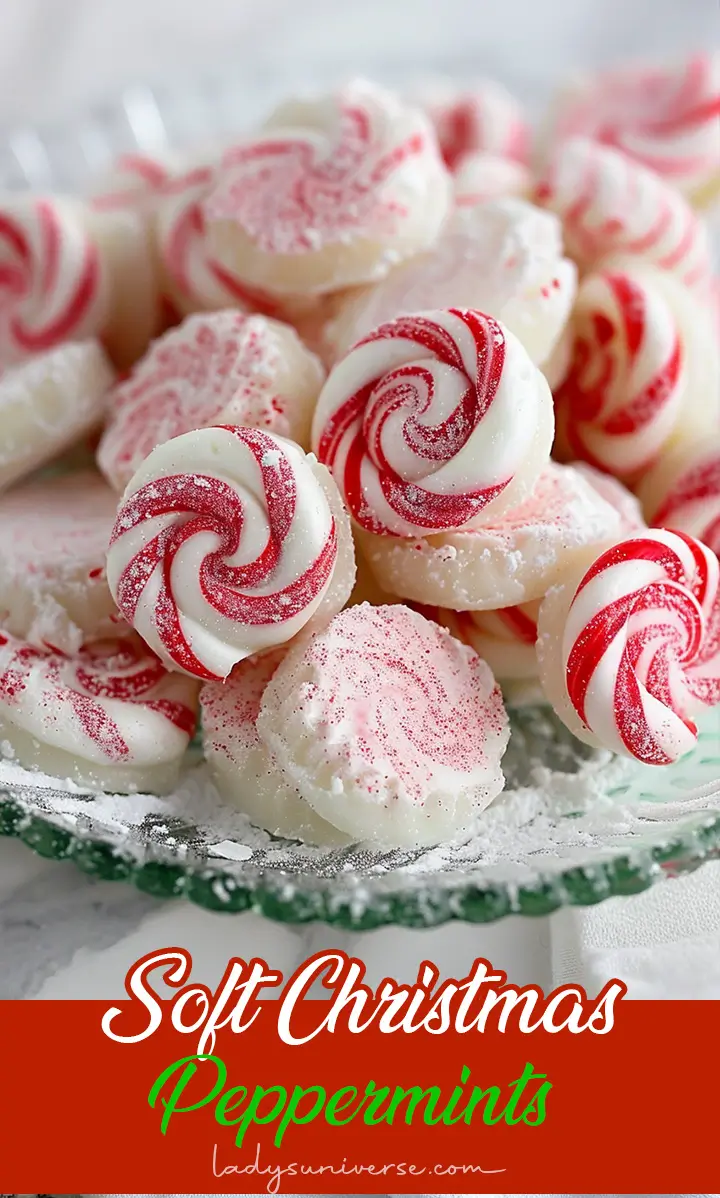
These classic soft Christmas peppermints, also known as butter mints, bring back a flood of warm holiday memories. I remember sitting in my grandma’s kitchen, sneaking a few mints when she wasn’t looking, and feeling the smooth peppermint flavor melt in my mouth. These little mints were always served in a pretty dish during Christmas gatherings, and they never lasted long! Their light, buttery texture and festive colors make them the perfect addition to holiday celebrations, whether as a treat for guests or tucked into gift baskets. Plus, they’re super fun to make—especially if you have little helpers eager to twist the dough into candy cane shapes.
The simplicity of this recipe is part of its charm. It takes just a few ingredients to create something that feels nostalgic, festive, and utterly delicious. You can even customize the colors to match your holiday decor, or keep it classic with red and white for that candy cane effect. Let’s dive into the details so you can start spreading the holiday cheer with these soft, buttery mints!
Contents
Ingredients:
- ½ cup butter, softened
- 3 cups powdered sugar
- 2 tbsp heavy whipping cream
- ¼ tsp peppermint extract (or adjust to taste)
- Red gel food coloring (or any color of your choice)
Equipment you need for Soft Christmas Peppermints:
- Electric mixer
- Mixing bowls
- Parchment paper or a clean surface for rolling
- Knife or kitchen shears for cutting the mints
Directions:
- Beat the Butter: Start by placing the softened butter in a large mixing bowl. Using an electric mixer, beat the butter on medium speed until it’s light and fluffy. This will take about 1-2 minutes and is essential for getting that smooth, melt-in-your-mouth texture.
- Add the Remaining Ingredients: Gradually add in the powdered sugar, a little at a time, so you don’t end up with a sugar cloud in your kitchen! Alternate with adding the heavy whipping cream to help the dough come together. Once the sugar and cream are fully incorporated, add the peppermint extract. If you like a stronger peppermint flavor, feel free to adjust the amount to your taste.
- Divide and Color: Once the dough is smooth and firm, divide it into two parts. Leave about three-quarters of the dough plain (white) and color the remaining quarter with red gel food coloring. You can knead the dough with your hands to evenly distribute the color—just remember to wear gloves if you don’t want red-tinted fingers!
- Roll and Twist: On a clean surface or parchment paper, roll small portions of each dough color into thin ropes. To create that classic candy cane swirl, twist the red and white ropes together gently. Once twisted, pinch off small sections about ½-inch in size—these will be your mints!
- Dry and Set: Place the twisted dough pieces onto parchment paper and let them air dry for 1-2 hours. This helps them firm up slightly before cutting. After they’ve had some time to set, cut each twist into bite-sized pieces using a sharp knife or kitchen shears. Once cut, let the mints dry completely for 24 hours before serving. The longer drying time gives them that perfect melt-in-your-mouth texture.
Tips for Success:
- Consistency: If the dough feels too sticky, add a little more powdered sugar until it becomes easy to handle. On the other hand, if it’s too dry, a tiny bit of extra cream can help soften it.
- Colorful options: You can experiment with different gel food coloring to create various holiday hues—green, red, white, or even pastel shades for a softer look.
- Minty flavor: Adjust the peppermint extract to your liking! Start with ¼ teaspoon, but feel free to add a bit more if you prefer a stronger flavor.
Variations:
- Chocolate Mint: Add a hint of cocoa powder to the dough for a chocolatey twist, and swap the peppermint extract for a chocolate-mint extract.
- Lemon or Orange Mints: For a citrusy variation, replace the peppermint extract with lemon or orange extract and color the mints with soft yellow or orange tones.
- Rainbow Mints: Use a variety of food colors to create rainbow mints—great for all festive occasions, not just Christmas!
FAQs:
- How long do these mints last? If stored in an airtight container at room temperature, these mints will last for up to 2 weeks. Make sure they’re fully dried before storing to avoid any sticking.
- Can I freeze butter mints? Yes! You can freeze the mints in an airtight container or freezer bag for up to 2 months. Just let them thaw at room temperature before serving.
- Can I make these mints without an electric mixer? Absolutely! If you don’t have an electric mixer, you can still make these by hand. It just requires a little more elbow grease to beat the butter and incorporate the powdered sugar.
- Why do the mints need to dry for 24 hours? Allowing the mints to dry for a full 24 hours gives them the ideal texture—firm on the outside but still soft and buttery inside.
Nutritional Information:
- Calories per mint: Approx. 60 kcal
- Serving size: Depends on the size you make, but this recipe makes about 60-70 small mints.
Serving Suggestions:
These soft butter mints are perfect for placing in small dishes around the house during holiday gatherings or adding to a candy tray for parties. They also make a lovely addition to holiday gift baskets—wrap them up in cellophane bags with a festive ribbon for a simple, thoughtful treat. Whether you’re serving them with coffee after a holiday meal or gifting them to friends and family, they’re sure to be a crowd-pleaser.
These soft Christmas peppermints are more than just a candy—they’re little bites of holiday nostalgia. Making them brings back so many memories, and sharing them continues that tradition for years to come.


