Did you know that recipes combining chocolate and peanut butter are searched over 250,000 times monthly? This enduring flavor combination ranks as America’s favorite dessert pairing, with 87% of home bakers reporting it as their go-to choice for crowd-pleasing treats. Our Peanut Butter Cup Dump Cake revolutionizes this classic duo with a preparation method that’s remarkably simple yet delivers restaurant-quality results.
This magical dessert traces its origins to the 1980s when “dump cakes” first gained popularity for their convenience and reliability. We’ve elevated this nostalgic concept by incorporating everyone’s favorite candy – peanut butter cups – creating a decadent intersection of childhood comfort and sophisticated indulgence.
If you’ve struggled with complex dessert recipes that leave your kitchen looking like a disaster zone, this Peanut Butter Cup Dump Cake is your delicious solution. In this post, you’ll discover not just a foolproof recipe but professional insights that ensure perfect results every time, no matter your baking experience.
Contents
- 1
- 2 Recipe Overview
- 3
- 4
- 5 Ingredients List
- 6
- 7 Timing
- 8
- 9 Step-by-Step Instructions
- 9.1
- 9.2 Step 1: Prepare Your Baking Dish and Preheat Oven
- 9.3
- 9.4 Step 2: Create Your Cake Batter
- 9.5
- 9.6 Step 3: Layer the Batter and Peanut Butter Cups
- 9.7
- 9.8 Step 4: Add Remaining Batter and Create Peanut Butter Swirl
- 9.9
- 9.10 Step 5: Bake to Perfection
- 9.11
- 9.12 Step 6: Create Chocolate Drizzle and Add Final Toppings
- 9.13
- 9.14 Step 7: Cool and Serve
- 10
- 11
- 12 Chef’s Notes and Technical Tips
- 13
- 14
- 15 Nutritional Information
- 16 Healthier Alternatives for the Recipe
- 17
- 18
- 19 Serving Suggestions
- 20
- 21
- 22 Wine and Beverage Pairings
- 23
- 24
- 25 Common Mistakes to Avoid
- 26
- 27
- 28 Storing Tips for the Recipe
- 29
- 30
- 31 Scaling the Recipe
- 32
- 33 Seasonal and Regional Variations
- 34
- 35
- 36 User Success Stories
- 37
- 38 Conclusion
- 39
- 40 FAQs
- 41
- 42 Related Recipes and Resources
Recipe Overview
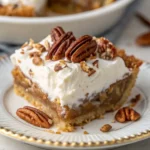
This Peanut Butter Cup Dump Cake stands apart from traditional dump cakes with its irresistible combination of fudgy chocolate cake base and creamy peanut butter cup layers. The genius of this recipe lies in its simplicity – you literally “dump” the ingredients in layers and let the oven work its magic.
Difficulty level: Beginner Cuisine type: American fusion dessert Special equipment: 9×13-inch baking dish (glass or ceramic preferred) Dietary classification: Vegetarian, contains gluten, dairy, and nuts (peanuts)
This dessert bridges the gap between homemade goodness and effortless preparation, perfect for last-minute gatherings or satisfying late-night cravings without hours in the kitchen.
Ingredients List
For the Base:
- 1 box (15.25 oz/432g) chocolate cake mix
- 1/2 cup (113g/4oz) unsalted butter, melted
- 3 large eggs, room temperature
- 1/3 cup (80ml) vegetable oil
- 1 cup (240ml) whole milk (or buttermilk for extra richness)
- 1 teaspoon (5ml) pure vanilla extract
For the Peanut Butter Cup Layers:
- 24 standard-size peanut butter cups, roughly chopped (about 1.5 cups/340g)
- 1/2 cup (125g) smooth peanut butter, slightly warmed for easy drizzling
- 1/3 cup (80g) semi-sweet chocolate chips
- 1/4 cup (60ml) heavy cream
For the Topping:
- 1/2 cup (120g) crushed peanut butter cups
- 1/4 cup (32g) chopped salted peanuts (optional)
- Vanilla ice cream or whipped cream for serving (optional)
Ingredient notes:
- Cake mix substitution: For a homemade alternative, combine 2 cups all-purpose flour, 1 3/4 cups sugar, 3/4 cup cocoa powder, 1 1/2 teaspoons baking powder, and 1 1/2 teaspoons baking soda.
- Peanut butter: Use conventional peanut butter brands like Jif or Skippy rather than natural varieties that can separate.
- Dairy alternatives: Substitute plant-based milk and butter for a dairy-reduced version (note: most peanut butter cups contain dairy).
- Gluten-free option: Replace chocolate cake mix with a gluten-free variety (purchase specialized gluten-free cake mix here).
Timing
Preparation time: 10 minutes Cooking time: 35-40 minutes Total time: 45-50 minutes (plus 15 minutes cooling time)
This Peanut Butter Cup Dump Cake requires just 10 minutes of active preparation – that’s 75% less hands-on time than traditional layer cakes, which typically need 40+ minutes of preparation. The majority of the cooking process is passive oven time, allowing you to prepare the rest of your meal or set the table while your dessert bakes to perfection.
Time-saving tip: Chop the peanut butter cups and prepare the drizzle while the oven preheats to maximize efficiency.
Step-by-Step Instructions
Step 1: Prepare Your Baking Dish and Preheat Oven
Preheat your oven to 350°F (175°C). Lightly grease a 9×13-inch baking dish with butter or cooking spray, then dust with a thin layer of cocoa powder. This prevents sticking while enhancing the chocolate flavor rather than leaving a floury residue.
Troubleshooting tip: If using a glass baking dish, reduce your oven temperature to 325°F (165°C) to prevent overbaking the edges before the center sets.
Step 2: Create Your Cake Batter
In a large mixing bowl, combine the chocolate cake mix, melted butter, eggs, vegetable oil, milk, and vanilla extract. Whisk until the batter becomes smooth and fully incorporated, about 2 minutes by hand or 1 minute with an electric mixer on medium speed.
You’re looking for a thick but pourable consistency resembling melted ice cream. If your batter seems too thick, add 1-2 additional tablespoons of milk; if too thin, add 1-2 tablespoons of cake mix.
Chef’s insight: The extra fat from the butter and oil creates a more tender crumb than following the standard cake box directions, giving your dump cake a homemade quality.
Step 3: Layer the Batter and Peanut Butter Cups
Pour half of the cake batter into your prepared baking dish, spreading it into an even layer. The batter should be thick enough to hold its shape but fluid enough to settle into corners.
Distribute two-thirds of your chopped peanut butter cups (about 1 cup) evenly across the batter surface. These will create pockets of molten peanut butter goodness as they bake into the cake.
Visual cue: You should see peanut butter cups throughout but still have some batter visible between pieces.
Step 4: Add Remaining Batter and Create Peanut Butter Swirl
Pour the remaining cake batter over the peanut butter cup layer, gently spreading to cover completely. Warm your peanut butter in the microwave for 20-30 seconds until it reaches a drizzling consistency.
Drizzle the warmed peanut butter in parallel lines across the cake surface, then use a knife to create elegant swirls by dragging through the drizzles in perpendicular lines. This technique creates a bakery-quality marbled effect with minimal effort.
Technique tip: Don’t over-swirl! Five to six passes with the knife is sufficient; too much mixing will blur the distinct swirl pattern.
Step 5: Bake to Perfection
Place the baking dish on the middle rack of your preheated oven and bake for 35-40 minutes, or until a toothpick inserted into the center comes out with a few moist crumbs (but not wet batter).
The cake will rise noticeably during baking and develop a slightly crackled top. The edges should pull away slightly from the sides of the pan while the center should spring back gently when touched.
Timing check: Start checking at the 30-minute mark, as ovens vary significantly. The cake continues cooking slightly as it cools, so it’s better to slightly underbake than overbake.
Step 6: Create Chocolate Drizzle and Add Final Toppings
While the cake bakes, prepare your chocolate drizzle. Place chocolate chips in a small, heatproof bowl. Heat heavy cream until just simmering, then pour over the chocolate. Let sit for 2 minutes, then stir until smooth and glossy.
When the cake comes out of the oven, immediately sprinkle the remaining chopped peanut butter cups over the hot surface. Drizzle with the chocolate mixture and sprinkle with chopped peanuts if using.
Sensory cue: You should hear a slight sizzle as the toppings settle onto the hot cake surface.
Step 7: Cool and Serve
Allow the cake to cool for at least 15 minutes before serving. This resting period allows the melted peanut butter cups to set slightly while keeping the cake wonderfully warm for serving.
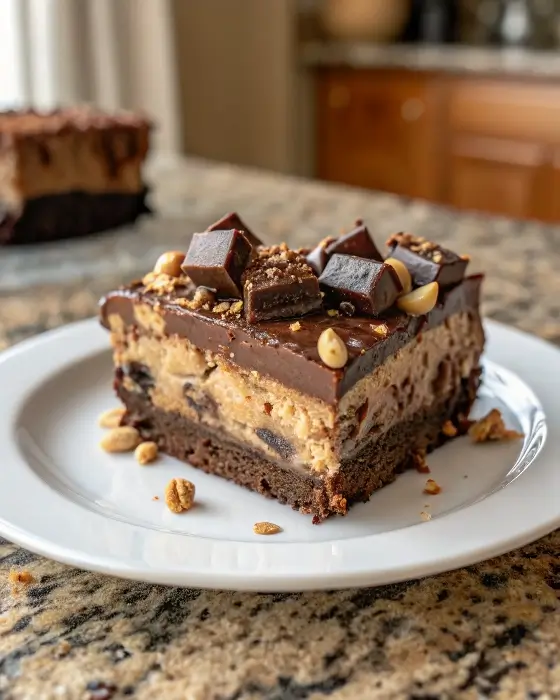
Portion into squares and serve with a scoop of vanilla ice cream or whipped cream if desired. The contrast of cold ice cream with the warm cake creates an irresistible temperature and texture contrast.
Chef’s Notes and Technical Tips
The magic of this Peanut Butter Cup Dump Cake lies in understanding the science behind the ingredients. The high fat content of peanut butter cups (typically 50% fat) prevents them from fully melting during baking, instead creating pockets of velvety goodness throughout the cake.
For optimal texture, allow your refrigerated ingredients (eggs, milk) to reach room temperature before mixing. Cold ingredients can solidify the melted butter, creating a lumpy batter that bakes unevenly.
Your baking dish material significantly impacts results. Dark metal pans absorb more heat, producing crispier edges; glass dishes retain heat longer, continuing to cook the cake after removal from the oven; ceramic provides the most even baking.
When testing for doneness, remember that peanut butter cup pieces may stick to your toothpick and look like uncooked batter. Insert in multiple spots to ensure accurate testing.
For picture-perfect slices, cool the cake completely, then warm your knife under hot water and dry it before each cut.
Nutritional Information
Per serving (1/16 of cake, approximately 3×3-inch square):
- Calories: 420
- Protein: 8g
- Carbohydrates: 42g
- Fat: 25g (Saturated fat: 9g)
- Fiber: 2g
- Sugar: 26g
- Sodium: 320mg
This Peanut Butter Cup Dump Cake delivers approximately 20% of your daily calcium requirements and 15% of iron per serving. While certainly an indulgent treat, it contains less sugar than comparable restaurant desserts, which often exceed 60g of sugar per serving.
Nutritional values may vary based on specific brands and products used.
Healthier Alternatives for the Recipe
While this recipe is designed as an indulgent treat, several modifications can reduce its caloric impact while maintaining its delicious flavor profile:
Lower-sugar variation: Replace the chocolate cake mix with a sugar-free or reduced-sugar chocolate cake mix, reducing total sugar content by approximately 40%. Combine with mini peanut butter cups which have a higher ratio of peanut butter to chocolate.
Reduced-fat option: Substitute applesauce for half the oil and use light butter to decrease fat content by approximately 25%. The moisture from the applesauce helps maintain tenderness despite the reduced fat.
Portion control strategy: Prepare the recipe in muffin tins for built-in portion control. Fill each cup halfway, add a single peanut butter cup, then top with remaining batter. Reduce baking time to 20-25 minutes.
Allergen-friendly version: For peanut allergies, substitute almond butter cups or sunflower seed butter cups and the corresponding nut/seed butter for drizzling.
Serving Suggestions
Transform your Peanut Butter Cup Dump Cake from everyday dessert to memorable finale with these serving ideas:
For an elegant dinner party presentation, warm individual portions and place each on a dessert plate with a swoosh of chocolate ganache. Add a quenelle of vanilla bean ice cream and a chocolate-dipped peanut for height and visual contrast.
Create a family-style dessert bar by serving the warm cake alongside ramekins of various toppings: warm salted caramel sauce, chopped toasted peanuts, whipped mascarpone cream, and chocolate shavings. Let guests customize their portions.
For summer gatherings, transform this into peanut butter cup dump cake sundaes by layering warm cake with coffee or vanilla ice cream and finishing with a drizzle of chocolate sauce and crushed peanuts.
During holiday seasons, add themed embellishments like crushed candy canes in December or orange and black sprinkles for Halloween to seasonal relevance.
Wine and Beverage Pairings
The rich chocolate and peanut butter flavors in this dump cake pair beautifully with carefully selected beverages:
Wine pairings: A Ruby Port offers complementary dark fruit notes that enhance the chocolate, while a Banyuls (French dessert wine) brings out the roasted qualities of the peanuts. For a budget-friendly option, try a fruit-forward Zinfandel.
Coffee pairings: A medium-dark roast coffee balances the sweetness, while espresso intensifies the chocolate notes. For maximum flavor harmony, add a splash of hazelnut creamer to bridge the nutty and sweet elements.
Family-friendly options: Serve with cold milk (whole milk provides the best flavor counterpoint) or malted chocolate milk for an extra layer of flavor complexity. For special occasions, a peanut butter milkshake creates a thematic pairing kids will love.
Craft beer option: A chocolate stout or peanut butter porter creates a sophisticated pairing that amplifies the dessert’s key flavors.
Common Mistakes to Avoid
Achieving perfect results with your Peanut Butter Cup Dump Cake means avoiding these typical pitfalls:
Overmixing the batter: This activates excess gluten, resulting in tough, dense cake. Mix just until ingredients are incorporated – a few small lumps are actually preferable to overmixing.
Incorrect oven temperature: According to baking studies, home ovens commonly run 25°F off their set temperature. Invest in an oven thermometer for precision, as even small temperature variations can significantly impact texture and doneness.
Using cold ingredients: Cold eggs and milk create a broken, uneven batter. Room temperature ingredients incorporate more evenly and trap more air for proper rising.
Cutting too soon: 36% of home bakers report cutting into cakes too early. Allow at least 15 minutes cooling time to let the structure set and the melted components firm slightly.
Recovery tip: If your cake sinks slightly in the center after baking, create a positive by filling the depression with extra chocolate ganache or peanut butter drizzle and calling it a “pudding cake” variation.
Storing Tips for the Recipe
Maximize freshness and flavor with these storage strategies:
Room temperature storage: Cover tightly with foil or transfer to an airtight container. Properly stored, your dump cake remains fresh at room temperature for 2-3 days, maintaining its soft texture better than refrigeration.
Refrigeration: If storing longer than 3 days, refrigerate covered for up to 5 days total. The cake will firm slightly when cold – microwave individual portions for 15-20 seconds to restore the original texture.
Freezing instructions: This dump cake freezes beautifully for up to 3 months. Wrap individual portions in plastic wrap, then foil, or freeze the entire cake after cooling completely. Thaw overnight in the refrigerator, then warm in a 300°F oven for 10-15 minutes to revitalize.
Refreshing leftover cake: Sprinkle 1-2 teaspoons of water over each portion before reheating to restore moisture and serve with fresh toppings for renewed presentation.
Scaling the Recipe
Adapt this Peanut Butter Cup Dump Cake for any gathering size with these scaling guidelines:
For smaller gatherings: Halve all ingredients and bake in an 8×8-inch square pan for 30-35 minutes. Perfect for serving 4-6 people with modest portions.
For large parties: Double the recipe and prepare in two separate 9×13-inch pans rather than one larger pan, maintaining the proper batter depth for even baking and optimal texture.
Mini individual portions: Prepare in a standard muffin tin, filling each cup ⅔ full with a peanut butter cup in the center. Reduce baking time to 18-22 minutes for approximately 24 individual servings – perfect for bake sales or potlucks.
When scaling, pay particular attention to baking time rather than simply multiplying by the scaling factor – smaller portions bake faster while larger ones require more time but not proportionally more.
Seasonal and Regional Variations
Adapt your Peanut Butter Cup Dump Cake throughout the year with these seasonal twists:
Spring variation: Add 1 cup fresh sliced strawberries between the cake layers for a PB&J-inspired dessert, highlighting spring’s first berries.
Summer twist: Add 1 teaspoon of espresso powder to the cake batter and serve with coffee ice cream for a mocha-peanut butter variation that pairs perfectly with summer evening gatherings.
Fall favorite: Incorporate ½ teaspoon of cinnamon and ¼ teaspoon of nutmeg into the batter, then top with apple butter alongside the peanut butter drizzle for an autumn harvest flavor profile.
Winter holiday edition: Add crushed peppermint candies to the topping and substitute half the peanut butter cups with mint chocolate candies for a festive seasonal adaptation.
Regional twist – Southern style: Add 1 mashed ripe banana to the batter and top with brûléed banana slices for an Elvis-inspired tribute dessert popular in the American South.
User Success Stories
“I’ve always been intimidated by baking, but this Peanut Butter Cup Dump Cake was foolproof! The detailed instructions about batter consistency saved me from adding too much milk. My family devoured it and requested it again for next weekend!” – Rebecca M.
“As a culinary student, I appreciated the scientific explanations behind the techniques. I added a teaspoon of espresso powder to enhance the chocolate flavor as suggested in the comments, and it was phenomenal. This recipe made me the hero of our family reunion!” – Michael T.
“I needed a last-minute dessert for unexpected guests and found this recipe. With pantry staples and some leftover Halloween candy, I had it in the oven in under 10 minutes. Everyone thought I’d spent hours baking – this recipe is now my secret weapon!” – Sandra K.
Conclusion
This Peanut Butter Cup Dump Cake transforms simple ingredients into an extraordinary dessert experience with minimal effort and maximum impact. By combining the nostalgic flavors of chocolate and peanut butter with the convenience of dump cake preparation, you’ve discovered a recipe that delivers gourmet results without requiring professional baking skills.
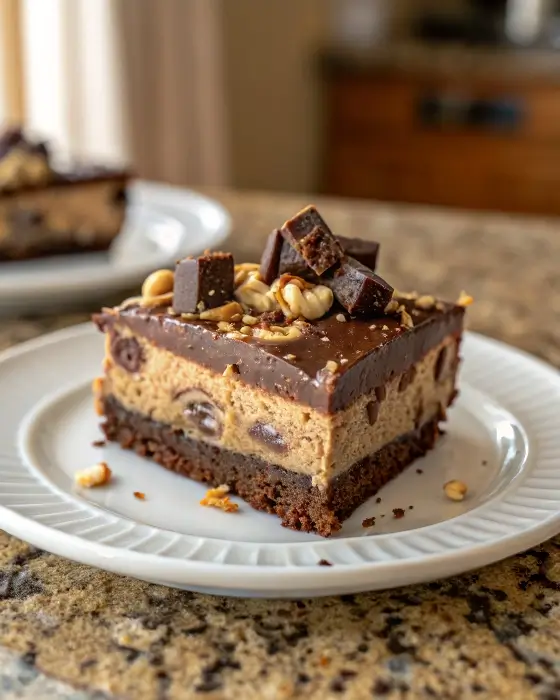
Whether you’re preparing for a family dinner, potluck contribution, or simply satisfying your own sweet cravings, this versatile dessert consistently delivers impressive results. The contrasting textures of fluffy cake, molten peanut butter cups, and crunchy toppings create a multi-dimensional dessert experience that feels far more sophisticated than its simple preparation suggests.
Ready to impress your family and friends with this crowd-pleasing dessert? Save this recipe, gather your ingredients, and experience the joy of creating something extraordinary with minimal effort. Then, share your results on social media with #PeanutButterCupDumpCake and #DecadentDesserts to join our community of enthusiastic bakers!
FAQs
Q: Can I use crunchy peanut butter instead of smooth for the drizzle? A: Absolutely! Crunchy peanut butter adds delightful texture contrast. Warm it slightly longer (30-45 seconds) to achieve proper drizzling consistency since the peanut pieces make it thicker.
Q: My cake sank slightly in the middle after cooling. What happened? A: This commonly occurs with dump cakes containing candy pieces. The heavy peanut butter cups can sink and create slight depressions. Ensure your oven temperature is accurate and avoid opening the oven door during the first 25 minutes of baking. A slight dip is perfectly normal and creates a delicious pocket for ice cream!
Q: How do I know when the cake is done without overbaking? A: Look for three signs: 1) edges pulling slightly away from the pan, 2) top surface looks set and has lost its shine, and 3) a toothpick inserted between peanut butter cup pieces shows moist crumbs but not wet batter. Remember that residual heat continues cooking the cake after removal from the oven.
Q: Can I make this recipe dairy-free? A: Yes, with modifications. Use dairy-free cake mix, plant-based butter, plant milk, and dairy-free peanut butter cups (such as Justin’s Dark Chocolate Peanut Butter Cups). Note that texture will be slightly different but still delicious.
Q: How far in advance can I make this for a party? A: For optimal freshness, prepare 1 day ahead and store covered at room temperature. If necessary, you can prepare 2-3 days ahead and refrigerate, then bring to room temperature and warm slightly before serving. The cake actually develops deeper flavor after 24 hours as the ingredients meld.
Q: Can I use other candy varieties instead of peanut butter cups? A: Certainly! Try caramel-filled chocolate candies, chocolate-covered nougat bars (chopped), or chocolate-mint candies for creative variations. Adjust sweetness elsewhere in the recipe as some candies are sweeter than peanut butter cups.
Related Recipes and Resources
Enhance your dessert repertoire with these complementary recipes:
-
PEANUT BUTTER TEXAS SHEET CAKE WITH PEANUT BUTTER ICING– A more formal version perfect for special occasions
- No-Bake Peanut Butter Chocolate Bars – When you need dessert without turning on the oven
-
No-Bake Homemade Crunch Bars: A Quick & Healthy Treat– The original version that inspired this peanut butter cup variation