There’s a certain charm to cooking in a well-seasoned cast iron skillet, and this Iron Skillet Blackberry Cobbler recipe brings that rustic magic to life. In just 40 minutes, you’ll have a warm, bubbling cobbler that’s a true testament to the simple pleasures of dessert.
The use of a cast iron skillet adds a distinct character to this cobbler. The way it evenly distributes heat and creates a delectable crust is something you’ll savor.
To start, melt 6 tablespoons of butter in your cast iron skillet in the oven. While the butter works its magic, you’ll create the cobbler batter.
In a mixing bowl, combine 1 cup of self-rising flour, 1/4 teaspoon of salt, 1/4 teaspoon of cinnamon, 1 cup of sugar, 1 cup of milk, and 1 teaspoon of vanilla extract. This mixture will form the base of your cobbler.
Once the butter in the skillet is sizzling and fragrant, pour the batter directly over it. But the star of the show? Two cups of fresh blackberries, generously scattered over the top.
Now, it’s time to let the oven work its magic. Bake the cobbler for around 30 minutes until it’s golden and bubbling. The aroma that fills your kitchen as it bakes is simply irresistible.
When it’s ready, serve this delightful cobbler warm. And here’s a tip to elevate your experience: a scoop of vanilla ice cream. The contrast of the warm, juicy blackberries and the cool, creamy ice cream is sheer perfection.
If you’re feeling adventurous, consider trying a different ice cream flavor, like cinnamon, for a bold twist. And for that finishing touch, add a sprig of mint or a light dusting of powdered sugar for some extra presentation points.
In terms of storage, this cobbler is good at room temperature for the day it’s made. If you have leftovers, refrigerate them for up to three days, ensuring they’re covered. Just remember to reheat before indulging for that warm, comforting experience all over again.
Have you experienced the joy of this Iron Skillet Blackberry Cobbler? Share your cobbler creations with us. Whether it was the star of your dinner table or a delightful dessert surprise, we’d love to hear your stories and see your photos.
Contents
- Prep Time: A snap at 10 minutes.
- Cook Time: Just half an hour between you and cobbler delight.
- Easy Ingredients: Simple pantry staples plus fresh blackberries.
- Serving Warm: Best served with a scoop of vanilla ice cream.
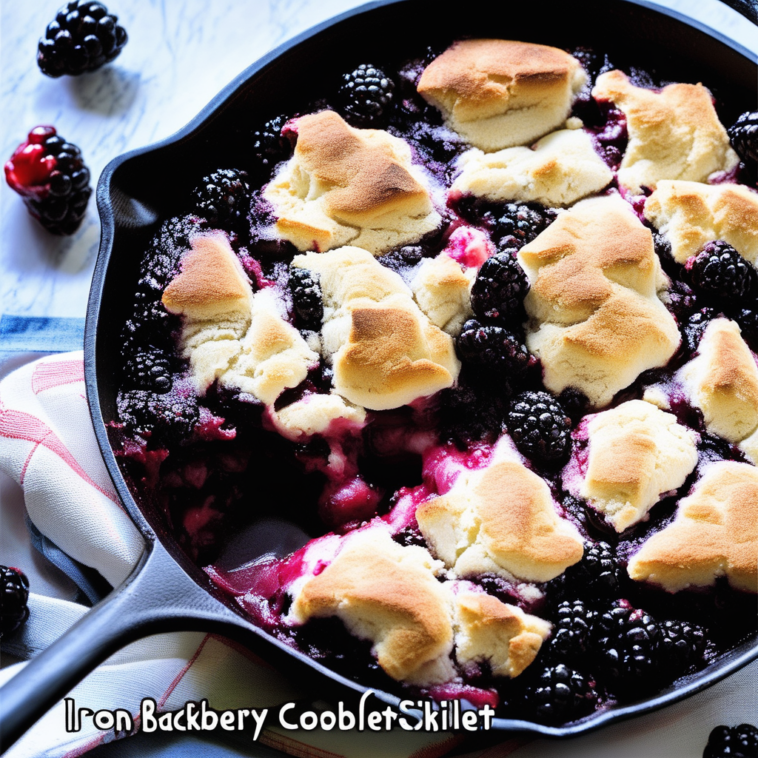
Iron Skillet Blackberry Cobbler
There’s nothing quite like a warm, juicy blackberry cobbler right out of the oven. This rustic dessert is a testament to the magic of cast iron cooking.
Ingredients for Iron Skillet Blackberry Cobbler:
| Ingredients | Quantity |
|---|---|
| Butter | 6 tablespoons |
| Self-Rising Flour | 1 cup |
| Salt | 1/4 teaspoon |
| Cinnamon | 1/4 teaspoon |
| Sugar | 1 cup + 2 tablespoons |
| Milk | 1 cup |
| Vanilla Extract | 1 teaspoon |
| Fresh Blackberries | 2 cups |
Instructions
- Butter Melt: Start by melting butter in your skillet in the oven.
- Mix Magic: Stir flour, salt, cinnamon, sugar, milk, and vanilla.
- Berry Drop: Pour batter into hot butter; blackberries get the final say.
- Bake Brief: Around 30 minutes to golden and bubbly.
- Serve Up Warm: Don’t forget the ice cream for a melty contrast.
Serving Suggestion
- Ice Cream Companion: Vanilla is classic, but cinnamon could be a bold twist.
- Fresh Finish: Add a sprig of mint or a dash of powdered sugar for presentation points.
See more Blackberry Cobbler
Storage
- Room Temp: Good for the day.
- Refrigerate: Up to 3 days, covered. Reheat before indulging again.
Experience the Iron Skillet Blackberry Cobbler?
Share your cobbler creation! Snap a photo or let us know how it turned out. Was it the star at your dinner table?
Special Equipment:
Serving Suggestions:
- This Iron Skillet Blackberry Cobbler is a delightful dessert on its own, but it becomes even more irresistible when served warm with a scoop of vanilla ice cream. The contrast of the warm, juicy blackberry filling and the cold, creamy ice cream is a match made in dessert heaven.
Tips & Variations:
- Self-Rising Flour: If you don’t have self-rising flour, you can make your own by combining 1 cup of all-purpose flour with 1 1/2 teaspoons of baking powder and 1/4 teaspoon of salt.
- Fresh vs. Frozen Blackberries: While fresh blackberries are ideal for this recipe, you can also use frozen blackberries if fresh ones aren’t available. Keep in mind that frozen blackberries may release more juice during baking, so adjust the baking time accordingly if needed.
- Spice It Up: Feel free to customize the flavor of your cobbler by adding a pinch of nutmeg or a dash of lemon zest to the batter for extra depth of flavor.
Common Questions:
Can I use other fruits in this Iron Skillet Blackberry Cobbler?
Absolutely! While blackberries are a classic choice, you can experiment with other fruits like blueberries, raspberries, or a combination of berries. Sliced peaches or apples also work well for a delicious twist.
Do I need to preheat the cast iron skillet?
Yes, preheating the skillet with the melted butter is an essential step in this recipe. It creates a beautifully golden and crispy crust on the bottom of the cobbler.
Can I make this cobbler in advance?
While this cobbler is best enjoyed fresh from the oven, you can make it ahead of time and reheat it when you’re ready to serve. Simply cover and refrigerate the leftovers, then reheat in the oven or microwave before serving.
What can I substitute for self-rising flour?
If you don’t have self-rising flour, you can make your own by combining all-purpose flour with baking powder and salt, as mentioned in the tips above.
Share your cobbler-baking adventures with us! Whether it’s a family gathering, a cozy evening at home, or a special occasion, this Iron Skillet Blackberry Cobbler is a comforting and timeless dessert that’s sure to please. Enjoy the simple pleasures of homemade cobbler, and don’t forget to share your experiences and photos in the comments or on social media. Happy baking! Bake, Serve, and Enjoy the Simple Pleasures!
Now, it’s time to bake, serve, and enjoy the simple pleasures of this rustic dessert classic! 🍴🍇