Is your home’s appearance being compromised by unsightly wall problems”Moldy and Peeling”? Many homeowners face the frustration of discovering mold growth or peeling paint, Many homeowners face the frustration of discovering mold growth or peeling paint, immediately assuming they’ll need to call in expensive professionals. The good news? With the right approach and basic supplies, you can easily tackle these common wall issues yourself, saving both time and money.
Contents
Why Wall Problems Happen
Before diving into repairs, it’s helpful to understand the root causes. Most wall deterioration stems from moisture problems, poor ventilation, or aging paint. By addressing these underlying issues during your repair process, you’ll create a more lasting solution.
Essential Supplies for Your DIY Repair
Before starting your project, gather these household items:
- Warm water
- White vinegar or mild household detergent
- Clean sponge or soft microfiber cloth
- Protective gloves and mask (essential for mold removal)
- Medium-grit sandpaper
- Wall putty or spackling paste
- Putty knife
- Mold-resistant primer
- Matching wall paint
- Paintbrush and/or small roller
Most homeowners already have many of these items on hand, making this a cost-effective solution compared to professional services that might charge $200-500 for similar repairs.
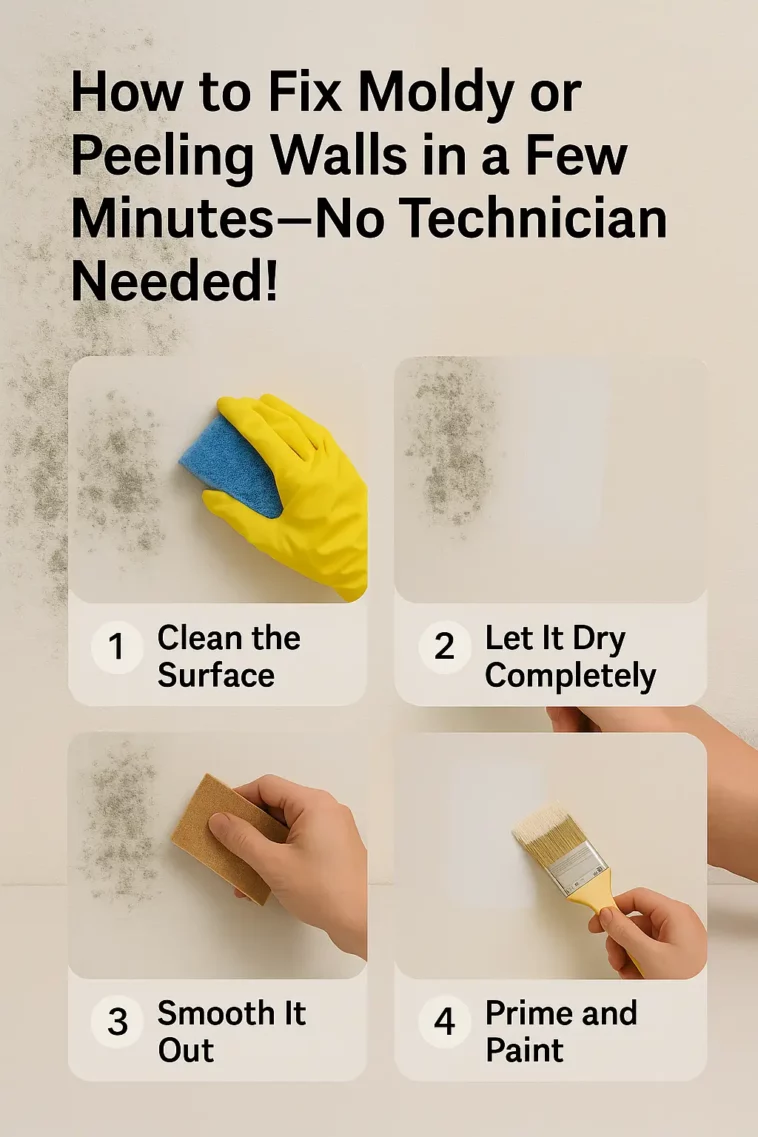
The Simple 4-Step Restoration Process
Step 1: Thorough Surface Cleaning
Begin by addressing any visible mold or surface contaminants:
- Mix a solution of warm water with either white vinegar (1:3 ratio) or a small amount of mild detergent
- Put on protective gloves and a mask, especially when dealing with mold
- Gently wipe the affected area with your cleaning solution using circular motions
- For stubborn mold, allow the vinegar solution to sit for 10-15 minutes before wiping
- Rinse with clean water to remove any residue
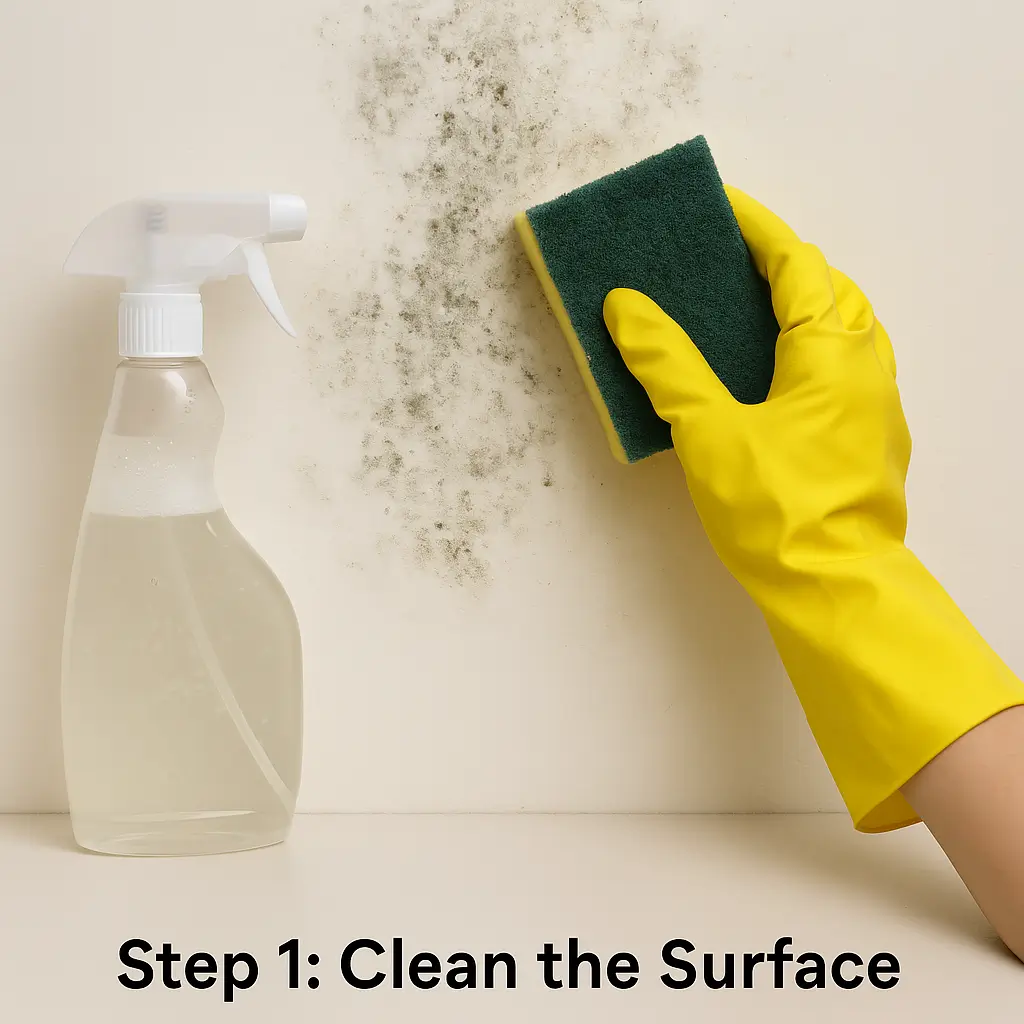
Pro Tip: Never scrub aggressively at moldy areas, as this can spread spores throughout your home. Instead, use gentle pressure and proper ventilation.
Step 2: Complete Drying Period
Patience during this step prevents future problems:
- Allow the cleaned area to dry completely (typically 4-6 hours)
- Improve drying time by opening windows or using a fan
- Ensure the wall feels completely dry to the touch before proceeding
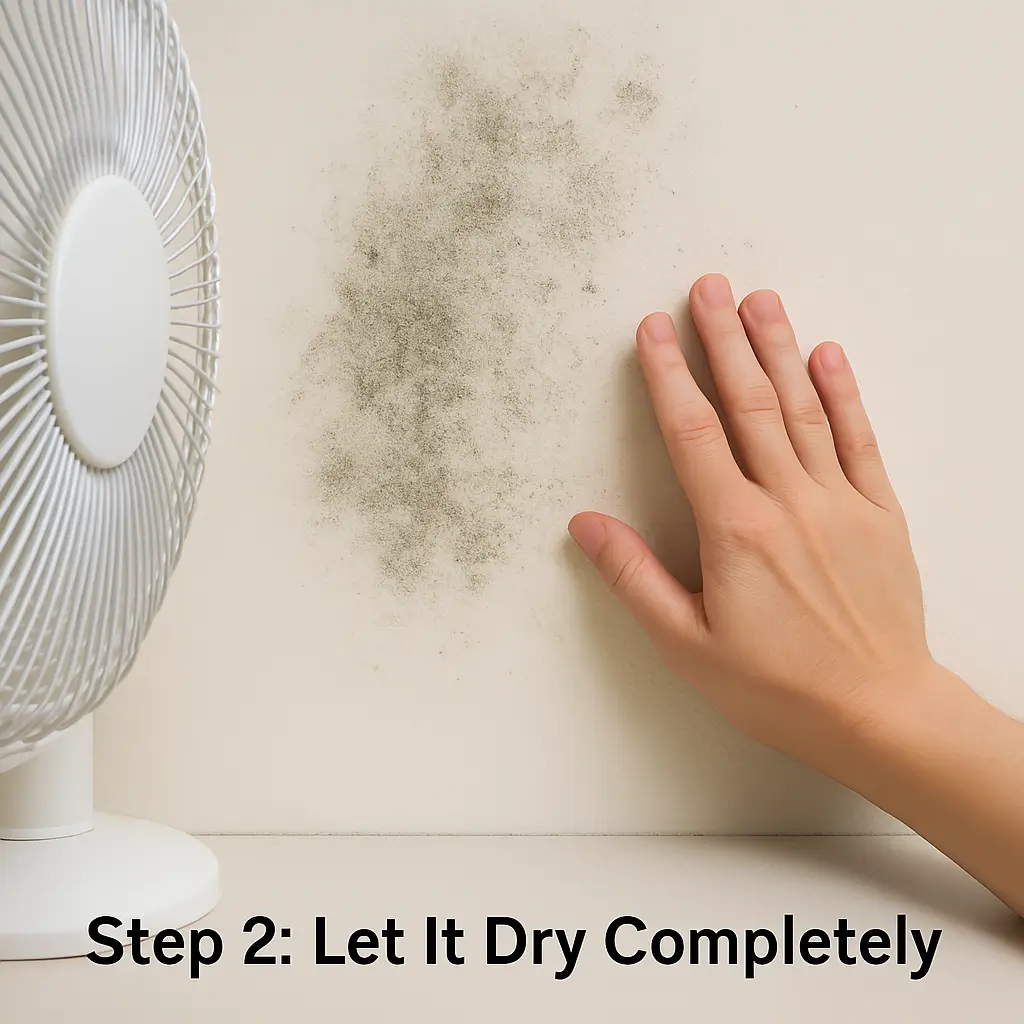
Why This Matters: Skipping proper drying is the most common reason DIY wall repairs fail. Moisture trapped beneath new paint or putty will guarantee continued problems.
Step 3: Surface Preparation
Creating a smooth foundation ensures professional-looking results:
- For peeling paint: Gently sand the edges of the peeling area to create a smooth transition
- For holes or cracks: Apply wall putty with a putty knife, slightly overfilling the damaged area
- Allow putty to dry completely according to package instructions
- Lightly sand the repaired area until it’s flush with the surrounding wall
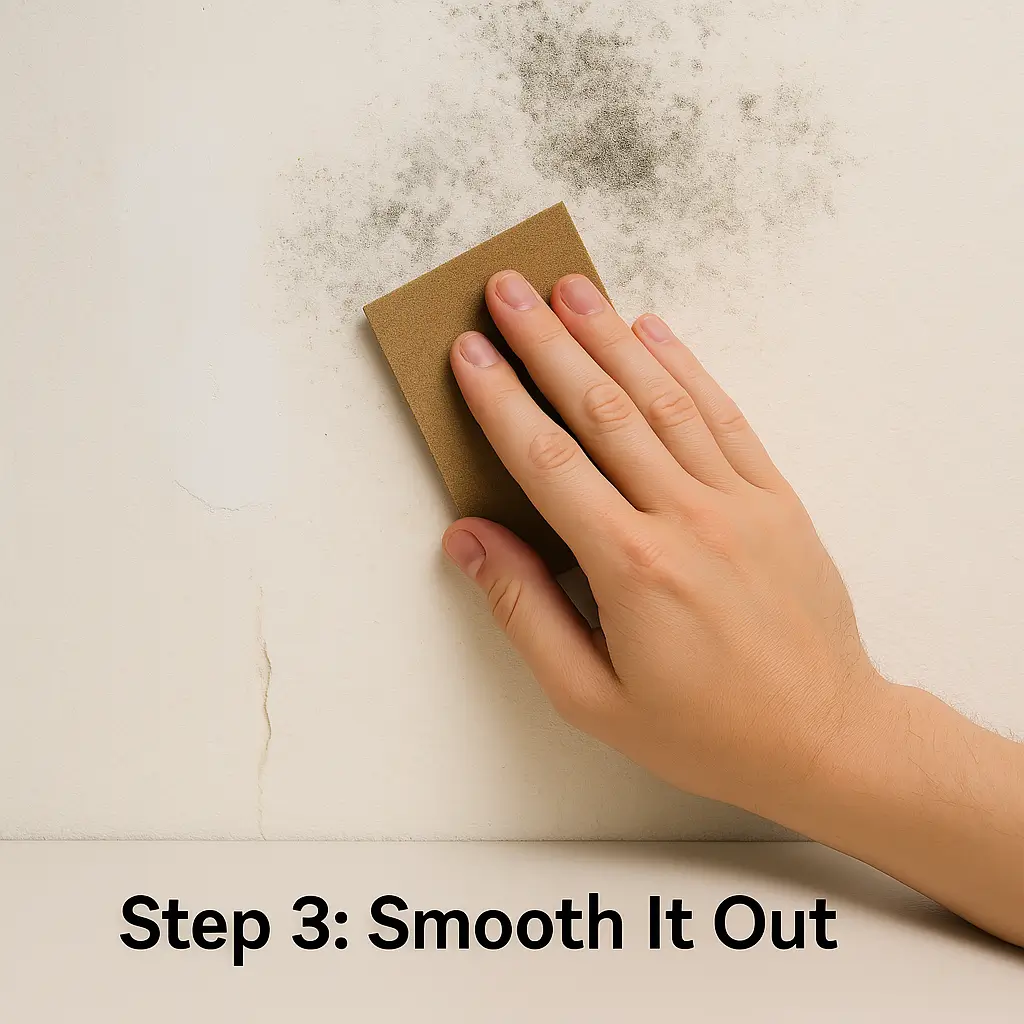
Technique Tip: Use finer grit sandpaper for final smoothing to achieve a seamless blend between old and new surfaces.
Step 4: Priming and Painting
The finishing touches that make your repair invisible:
- Apply a thin coat of mold-resistant primer to the prepared area
- Allow primer to dry completely (usually 1-2 hours)
- Using a brush for smaller areas or roller for larger sections, apply wall paint that matches your existing color
- For perfect blending, feather the edges of your paint slightly beyond the repaired area
- Apply a second coat if necessary after the first has dried
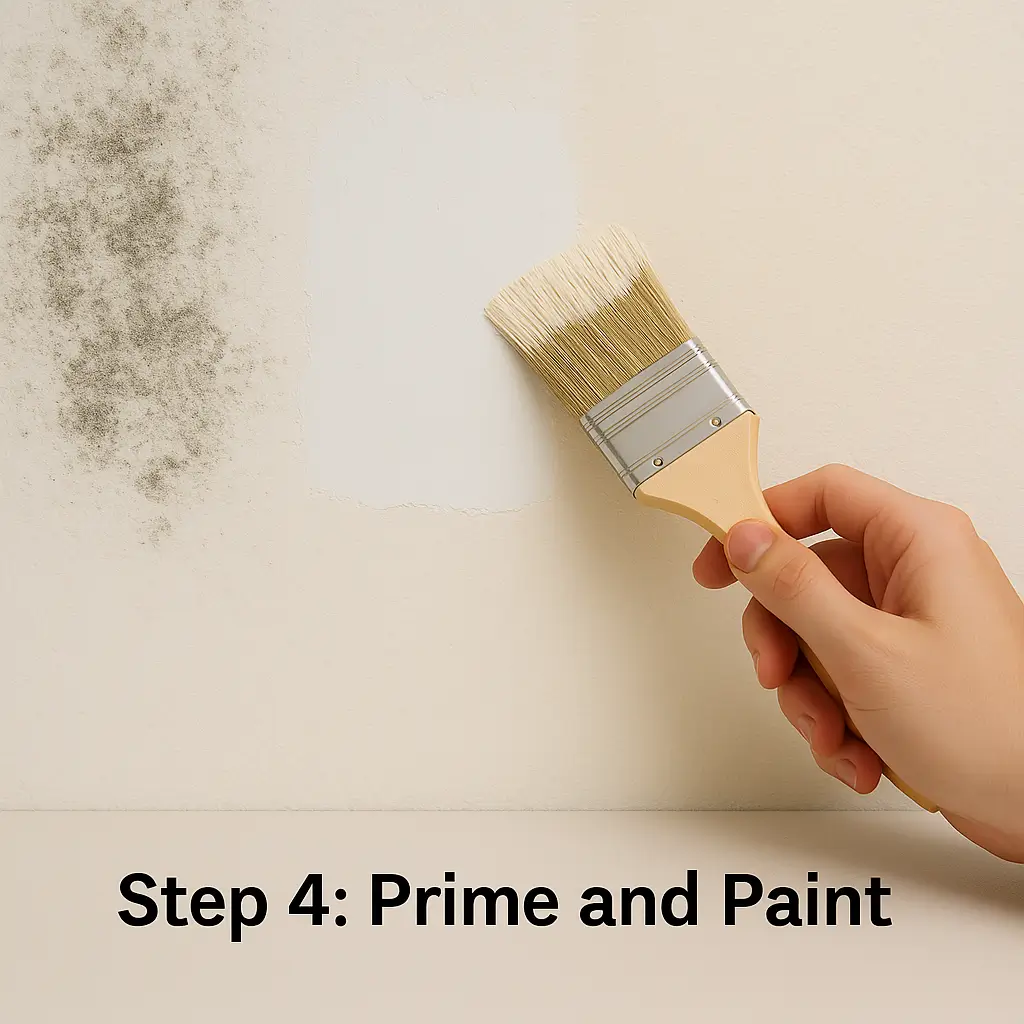
Color-Matching Secret: If you don’t have the original paint, take a small chip from an inconspicuous area to your local paint store for precise matching.
Preventing Future Wall Problems
After your successful repair, implement these simple practices to keep your walls in excellent condition:
- Maintain indoor humidity levels between 30-50% using dehumidifiers if necessary
- Ensure proper ventilation in bathrooms and kitchens
- Address any leaking pipes or roof issues promptly
- Consider using washable, mold-resistant paint in moisture-prone areas
- Periodically inspect walls for early signs of problems
When to Call a Professional
While most wall issues can be handled as DIY projects, some situations warrant professional attention:
- Extensive mold covering large areas (more than 10 square feet)
- Mold that returns despite multiple proper treatments
- Water damage extending into the wall structure
- Signs of structural damage behind the wall
By following this simple guide, you’ll not only save on repair costs but also gain valuable home maintenance skills. The satisfaction of successfully restoring your walls yourself is an added bonus to the fresh, renewed appearance of your living space.