Contents
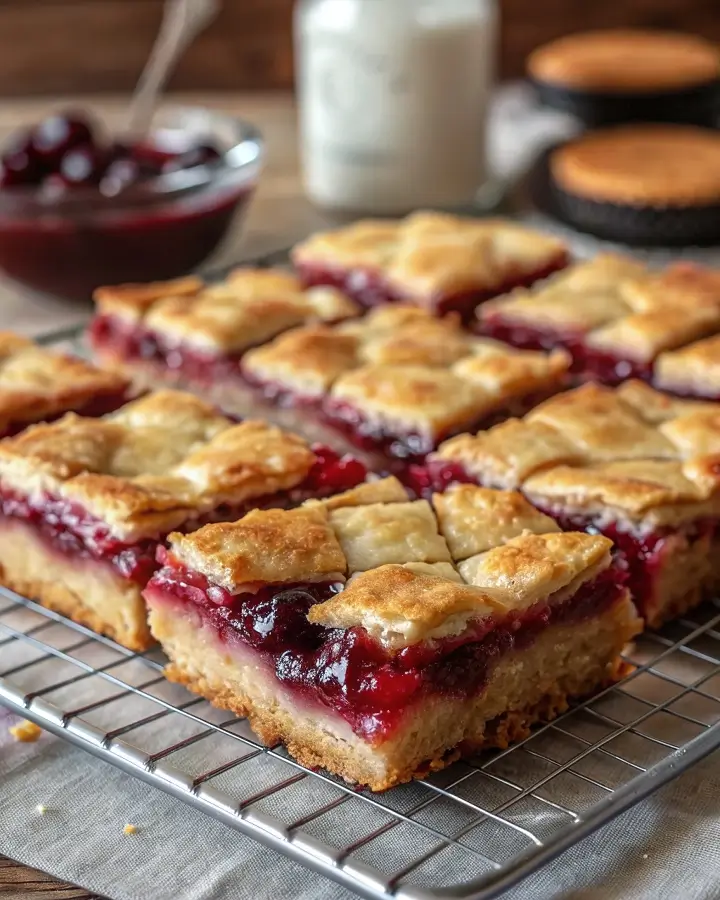
My cousin Jenna brought these cherry pie bars to our Canada Day potluck last summer, and I watched three grown men nearly come to blows over the last square. I’m not exaggerating – my uncle literally reached across the picnic table. That’s when I knew I needed this recipe in my life, and now I’m sharing it with you.
Cherry Pie Bars Ingredients
For the Crust & Topping:
- 3 cups all-purpose flour (375g)
- 1½ cups granulated sugar (300g)
- 1 teaspoon baking powder (5g)
- ¼ teaspoon salt (1g)
- 1 cup cold butter, cubed (226g)
- 1 large egg
- 1 teaspoon almond extract (5ml)
For the Filling:
- 2 cans (21 oz each) cherry pie filling (1190g total)
- ½ teaspoon almond extract (2.5ml)
Step-by-Step Instructions
- Preheat your oven to 350°F (175°C) and grease a 9×13-inch baking pan.
- Combine flour, sugar, baking powder, and salt in a large mixing bowl.
- Cut in cold butter using a pastry cutter until mixture resembles coarse crumbs.
- Whisk egg and almond extract together, then stir into flour mixture until combined.
- Press two-thirds of the crumb mixture firmly into prepared pan bottom.
- Mix cherry pie filling with almond extract in a separate bowl.
- Spread cherry filling evenly over pressed crust layer, leaving no gaps.
- Crumble remaining dough mixture over cherry filling – don’t worry about full coverage.
- Bake for 45-50 minutes until top is golden and you hear the filling bubbling.
- Cool completely in pan on wire rack before cutting into bars.
Perfection.
Pro Tips & Variations for Cherry Pie Bars
Freeze your butter for 15 minutes before cutting it into the flour mixture. This creates that perfect crumbly, shortbread-like texture that makes these cherry pie bars absolutely irresistible. Y’all’re going to notice the difference immediately.
Try mixed berries instead of just cherries – I’ve done raspberry-blueberry combinations that disappeared faster than Tim Hortons coffee on a Monday morning. The tartness plays beautifully against the sweet, buttery crust.
Add a glaze by whisking together 1 cup powdered sugar with 2 tablespoons milk and drizzling over cooled bars. Boom! Instant bakery-level presentation for your next bake sale or book club meeting.
Storage & Food Safety
Store these cherry pie bars in an airtight container in the refrigerator for up to five days. The filling stays fresh and the crust maintains its tender texture beautifully when kept cool.
For longer storage, wrap individual bars in plastic wrap and freeze for up to three months. Thaw overnight in the refrigerator before serving. If reheating, warm to 165°F for food safety, though honestly, these taste amazing straight from the fridge.
The cherry filling is acidic enough to prevent bacterial growth at room temperature for a few hours during serving, but don’t leave them out longer than that.
Nutrition & Serving Ideas
Per Bar (makes 24):
- Calories: 215
- Total Fat: 8g
- Saturated Fat: 5g
- Carbohydrates: 34g
- Protein: 2g
- Sugar: 21g
- Fiber: 1g
These bars are perfect alongside vanilla ice cream – the warm-cold contrast is something to write home about. They’re also fantastic at breakfast with a strong cup of coffee, though my dentist probably wouldn’t approve.
Pack them for picnics, potlucks, or camping trips. The bars travel well and don’t require refrigeration for short periods. During hockey playoffs, I keep a pan in the fridge for unexpected guests who drop by to catch the game.
FAQs About Cherry Pie Bars
Q: Can I use fresh cherries instead of canned filling? A: Absolutely! You’ll need about 4 cups pitted cherries tossed with ¾ cup sugar and 3 tablespoons cornstarch. The texture will be slightly different but equally delicious.
Q: Why is my topping too dry and crumbly? A: Your butter was likely too warm when you cut it in. Keep everything cold – even chill your bowl if you’re baking on a hot day.
Q: Can I make these gluten-free? A: Yes! Substitute a 1:1 gluten-free baking flour. The texture will be slightly more delicate, so handle the bars gently when cutting and serving.
The Secret Nobody Tells You
Last November, I was rushing to make these for my daughter’s bake sale when I realized I’d forgotten the almond extract. The smell of butter and cherries baking together was already filling my kitchen, and panic set in. I ended up using vanilla extract instead, and you know what? Nobody noticed. The bars still vanished within twenty minutes of the sale opening.
That taught me something important about cherry pie bars – they’re remarkably forgiving. The combination of buttery, crumbly crust and sweet-tart cherry filling is what people are really here for.
The texture of these bars hits differently than regular pie. You get that satisfying crunch from the crust without dealing with finicky pastry dough that tears or shrinks. No blind-baking required, no crimping skills needed, and you can cut them into perfect squares that actually hold their shape on a plate.
Why These Work for Every Occasion
I’ve brought cherry pie bars to church suppers, holiday gatherings, and Tuesday night dinners when I just needed something sweet. They fit everywhere because they occupy this perfect middle ground between casual and special.
They’re fancy enough for a bridal shower but humble enough for a kids’ soccer game. The ruby-red filling peeks through the golden crumble topping like a promise of good things to come.
I’ve been baking Maritime-inspired comfort food in my Halifax kitchen for twelve years, creating recipes that bring people together around the table.