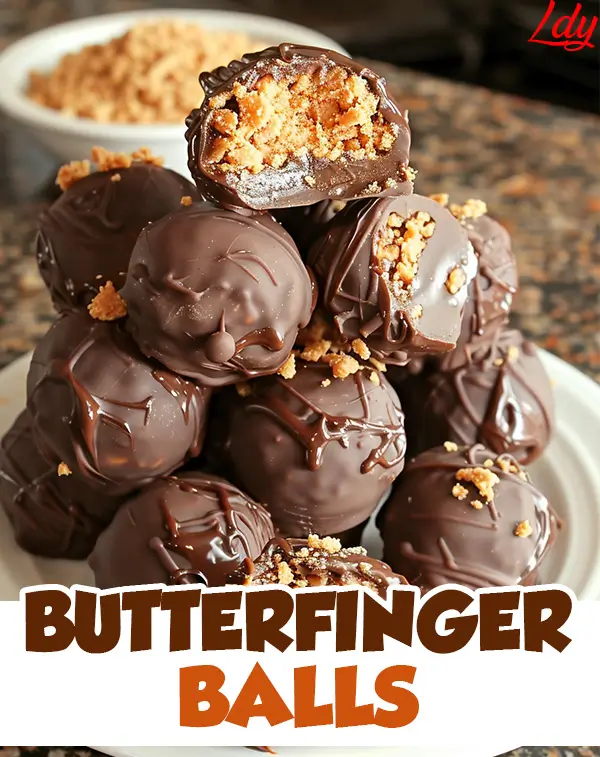
Butterfinger Balls are the ultimate treat for peanut butter and chocolate lovers! They’re dangerously delicious, and let’s be honest—you’ll probably eat half the batch before they even make it to the table. With the perfect combination of creamy peanut butter, crunchy Butterfinger bits, and rich chocolate coating, these no-bake treats are ideal for parties, tailgating, or homemade gifts. Plus, they’re super easy to make, which means you can whip up a batch whenever the craving hits!
Contents
Ingredients
- Base Mixture:
- 1 (16-oz) box powdered sugar
- 2 ½ cups graham cracker crumbs
- 5 (1.9-oz) Butterfinger bars, crushed
- 1 ¼ cup butter, melted
- 1 ½ cups crunchy peanut butter
- For Coating:
- 1 (24-oz) package chocolate almond bark or chocolate candy coating
Instructions
1. Make the Base Mixture:
- In a large mixing bowl, combine the powdered sugar, graham cracker crumbs, crushed Butterfinger bars, melted butter, and peanut butter. Stir everything together until fully combined and the mixture holds together.
2. Shape the Balls:
- Use a cookie scoop or your hands to shape the mixture into 1-inch balls. Place them on a parchment-lined baking sheet or tray.
- Refrigerate the balls for at least 30 minutes to firm them up. This makes dipping them in chocolate much easier.
3. Melt the Chocolate Coating:
- Follow the package instructions to melt the chocolate almond bark or candy coating. You can do this in the microwave in 30-second intervals, stirring each time until smooth, or use a double boiler for even heating.
4. Dip the Balls:
- Remove the chilled peanut butter balls from the refrigerator.
- Using a fork or toothpick, dip each ball into the melted chocolate, ensuring it’s evenly coated. Tap off any excess chocolate by gently tapping the fork on the edge of the bowl.
- Place the coated balls back onto the parchment or wax paper.
5. Let Them Set:
- Allow the Butterfinger Balls to sit at room temperature until the chocolate is fully set. For faster results, pop them back in the refrigerator for 10-15 minutes.
Pro Tips
- Crunchy vs. Creamy Peanut Butter: If you prefer a smoother texture, use creamy peanut butter instead of crunchy. Either way, the Butterfinger bits give these treats plenty of crunch!
- Decorate for Fun: Add festive sprinkles on top while the chocolate is still wet. Use red and green for Christmas, pink and red for Valentine’s Day, or your favorite team colors for game day.
- Make Ahead: These can be made several days in advance and stored in an airtight container in the fridge. They’re also freezer-friendly, so you can stash a batch for later!
How Many Does It Make?
- This recipe makes about 3 to 4 dozen Butterfinger Balls, depending on how large you roll them.
Serving Suggestions
- These are perfect for holiday cookie trays, dessert tables at parties, or as a sweet snack for movie nights.
- Package them in cute tins or boxes for homemade gifts—they’re a hit every time!
Storage Tips
- Refrigerator: Store in an airtight container for up to 7 days.
- Freezer: Freeze for up to 2 months. Thaw in the refrigerator or at room temperature before serving.
Why You’ll Love These Butterfinger Balls:
- No Baking Required: Easy to whip up in under an hour!
- Addictively Delicious: The mix of chocolate, peanut butter, and Butterfinger crunch is unbeatable.
- Perfect for Any Occasion: Customize with sprinkles to match holidays, birthdays, or team events.
These Butterfinger Balls are a no-fuss, crowd-pleasing dessert that’ll disappear faster than you can make them. Rich, peanut buttery, and covered in chocolate, they’re perfect for sharing (or sneaking one at a time straight from the fridge—no judgment here!). Make a batch today, and get ready for everyone to beg for the recipe. Happy snacking! 🍫🥜✨


