Advertisements
There’s this memory I have from childhood that won’t leave me alone. Thursday nights at my grandmother’s place in Pennsylvania, and I’d walk in the door and immediately hear it—THWACK. THWACK. THWACK. Her pounding the absolute hell out of a piece of meat on her cutting board. The whole house shook a little bit. She’d look up, meat mallet in hand, and say “Gotta beat the meanness out of it.”
She meant the steak. Round steak, specifically. The kind that costs next to nothing because it comes from the back leg of the cow and is tough as boot leather if you don’t know what you’re doing with it.
Advertisements
This was Swiss steak. And no, before you ask—nothing about it is Swiss. Zero connection to Switzerland. The name probably comes from this old textile thing called “swissing” where they’d run fabric through rollers to make it smooth. Somewhere along the way somebody started calling pounded meat “swissed” and the name stuck. By the 1930s it was everywhere—church cookbooks, the backs of Campbell’s soup cans, handwritten recipe cards passed between neighbors.
My grandmother grew up during the Depression. She saved everything. Twist ties from bread bags went in a drawer. Aluminum foil got washed and reused. And you definitely didn’t waste meat just because it came from the wrong part of the animal. You figured it out.
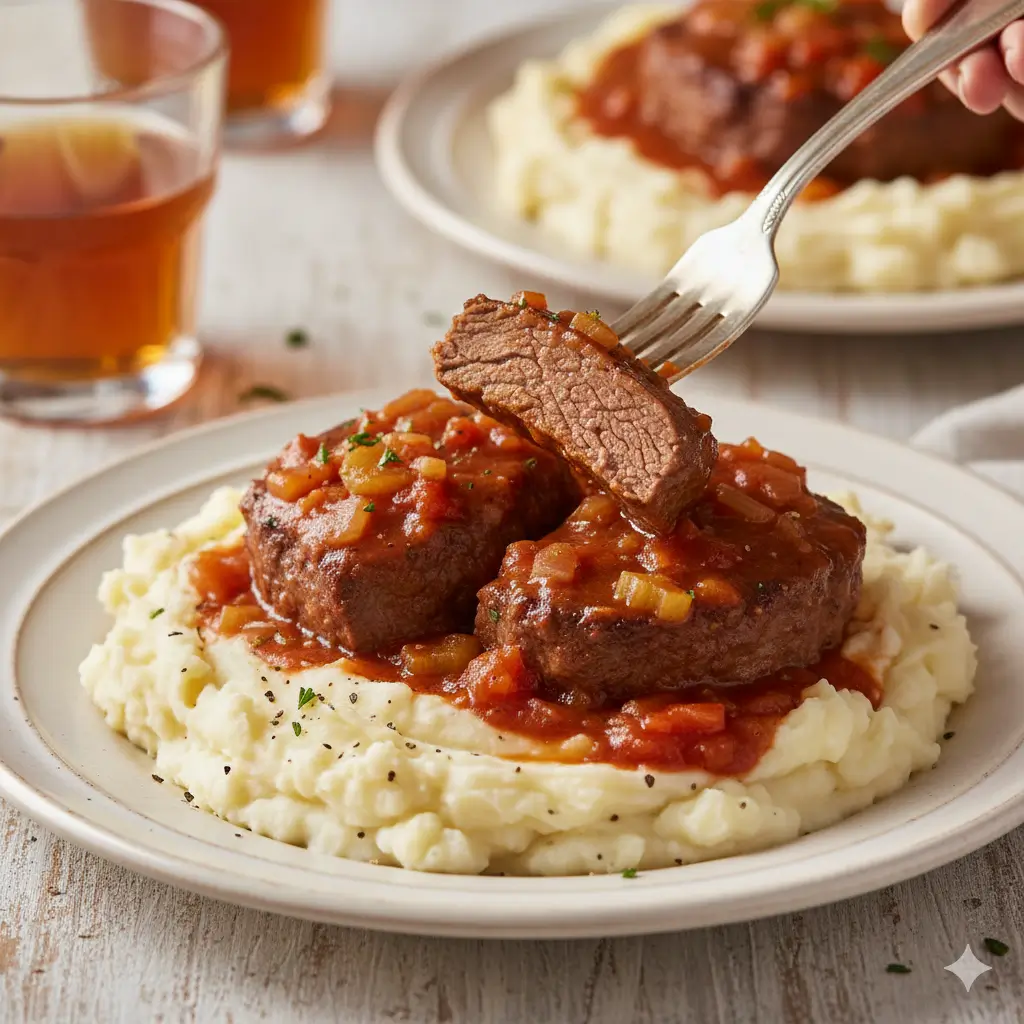
Thursday nights meant Swiss steak. She’d make this huge crater in the mashed potatoes and all the gravy would pool up in there and honestly? I’ve been chasing that taste ever since.
Contents
Getting the Meat
So here’s the deal with Swiss steak—you can’t use the good stuff. I know that sounds backwards but hear me out. I tried making this with chuck roast once because I thought I was being clever. Chuck has all that nice marbling, it’s forgiving, it’s what you’d normally grab for braising. And it completely fell to pieces after two hours. Just shredded beef floating in sauce.
That’s not what this is supposed to be. You want to be able to cut an actual slice of meat, see that it’s meat, not fish it out of a stew.
Round steak holds together. Top round, bottom round, eye of round—any of them. They’re all from that back leg, they’re all lean, they’re all tough. But the toughness is the whole point. There’s a lot of connective tissue in there, which is mostly collagen, and when you braise it low and slow for a couple hours that collagen melts into gelatin and that’s what makes it tender. It’s also what gives the sauce that almost silky feel.
Get about two pounds total. I usually go with top round cut about three-quarters of an inch thick. You can ask the butcher to slice it or just buy a roast and do it yourself. Eye of round looks prettier—it’s got that nice round shape like a filet—but in my experience it dries out a hair more. Not terrible, just something I’ve noticed.
Beating It Into Submission
This is where you work out whatever’s bothering you. Bad day at work? Traffic on the way home? Doesn’t matter, you’re about to take it all out on this steak.
If you’ve got one of those mechanical tenderizers with all the little blades, great. Run each piece through twice and you’re done. Most of us don’t have that though. Get a meat mallet—the kind with the spiky side (forget the flat side, that won’t do much here). Put a steak on your board and just start pounding. I’m talking really hit it. Work across the whole surface. Flip it. Do it again.
You want to go from three-quarters of an inch down to about half an inch and the meat should look beat up. That’s the goal.
Yeah, your arm’s gonna get tired. When I was testing this recipe I timed myself once and it took about seven minutes per steak to really do it right. That’s a long time to be hitting something with a hammer. But that’s what breaks down those muscle fibers so the meat stays together while it braises but still comes out fork-tender.
Maria Kowalski runs a meat-and-three outside Nashville, been doing it for 15 years, makes Swiss steak twice a week. She told me she tells people to pretend they’re working out their frustrations. “You know, bad day, boss yelled at you, whatever—pound it out. By the time you’re done you feel better and the steak’s ready to go.” She laughed when she said it but she’s not wrong.
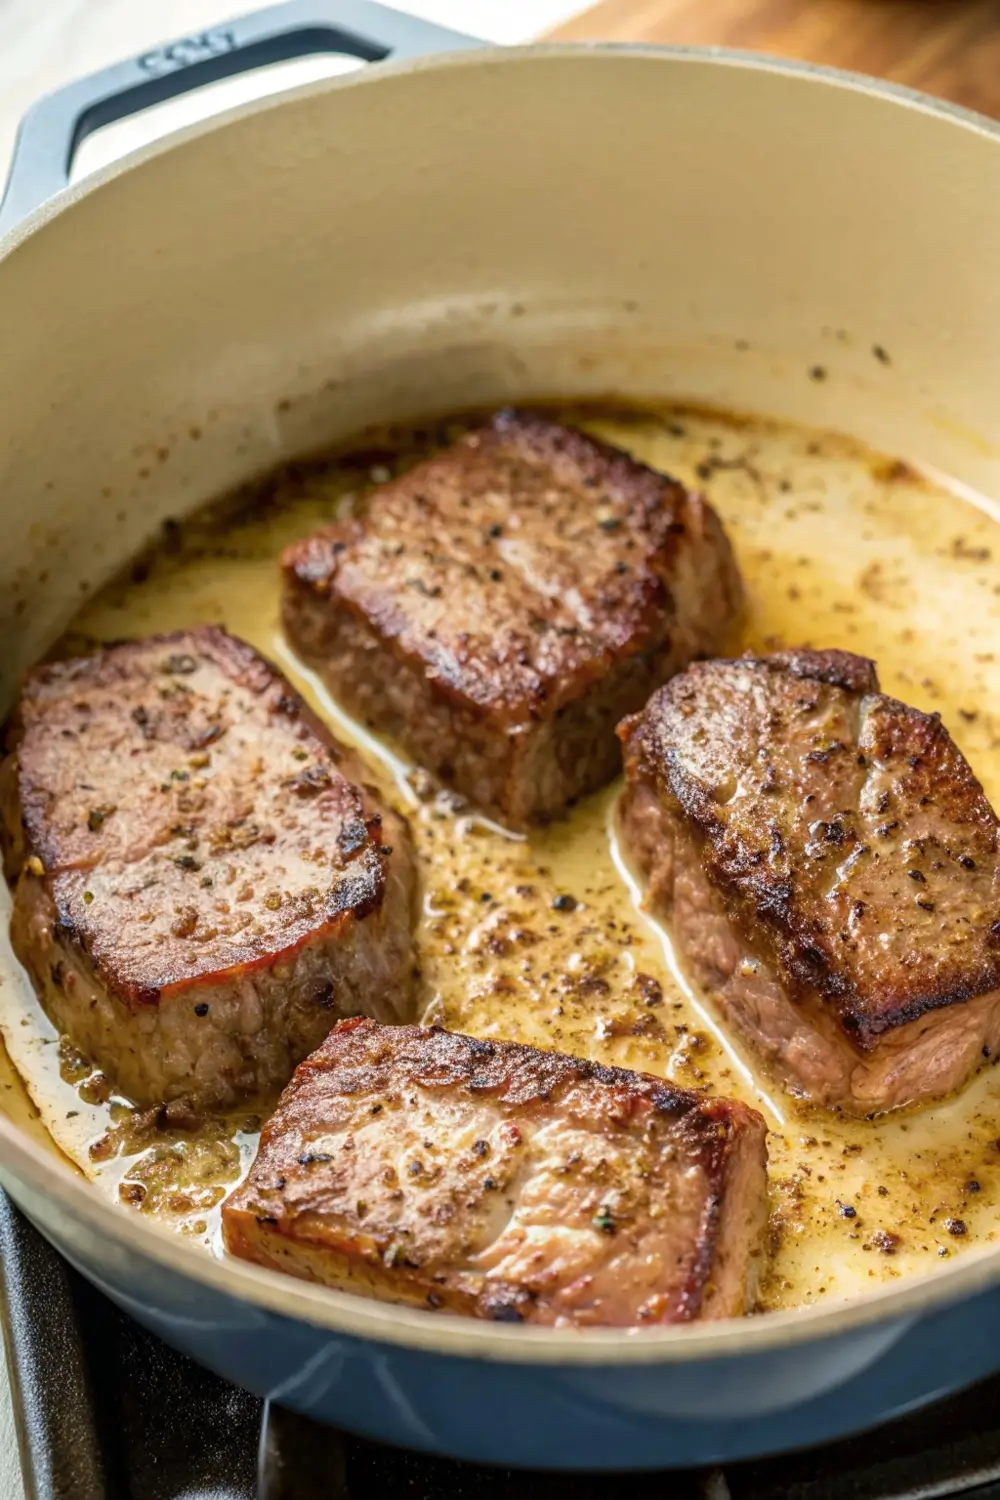
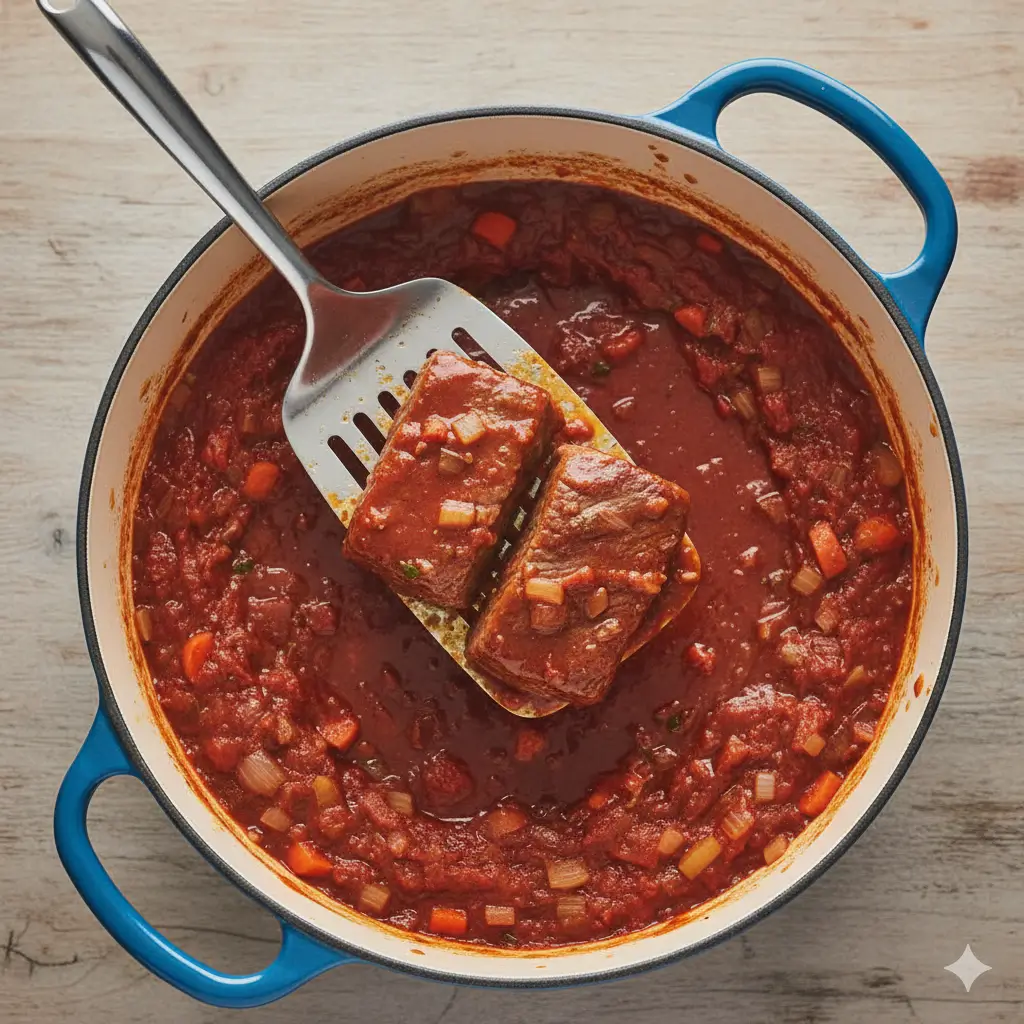
The Sear
After you’ve pounded the steaks, hit both sides with salt and pepper. Be generous. Then drag each one through some flour—just a light coating, shake off what doesn’t stick.
The flour does two things here. One, when you sear it you get that browned crust and all those good flavors that come from high heat hitting proteins. Two, later when everything’s braising together, that flour dissolves into the liquid and thickens it into actual gravy instead of just meat-flavored water.
Get a heavy pan screaming hot. Cast iron’s ideal, stainless steel works too. Add some oil and let it shimmer, then lay in your steaks. Don’t crowd them—if they don’t all fit, do it in batches. And then here’s the hard part: leave them alone. Don’t touch them. Three, maybe four minutes per side. You want them dark brown, almost looks burned but isn’t quite.
All those crusty bits that stick to the pan? That’s gold. Don’t wash it out. You’re building flavor.
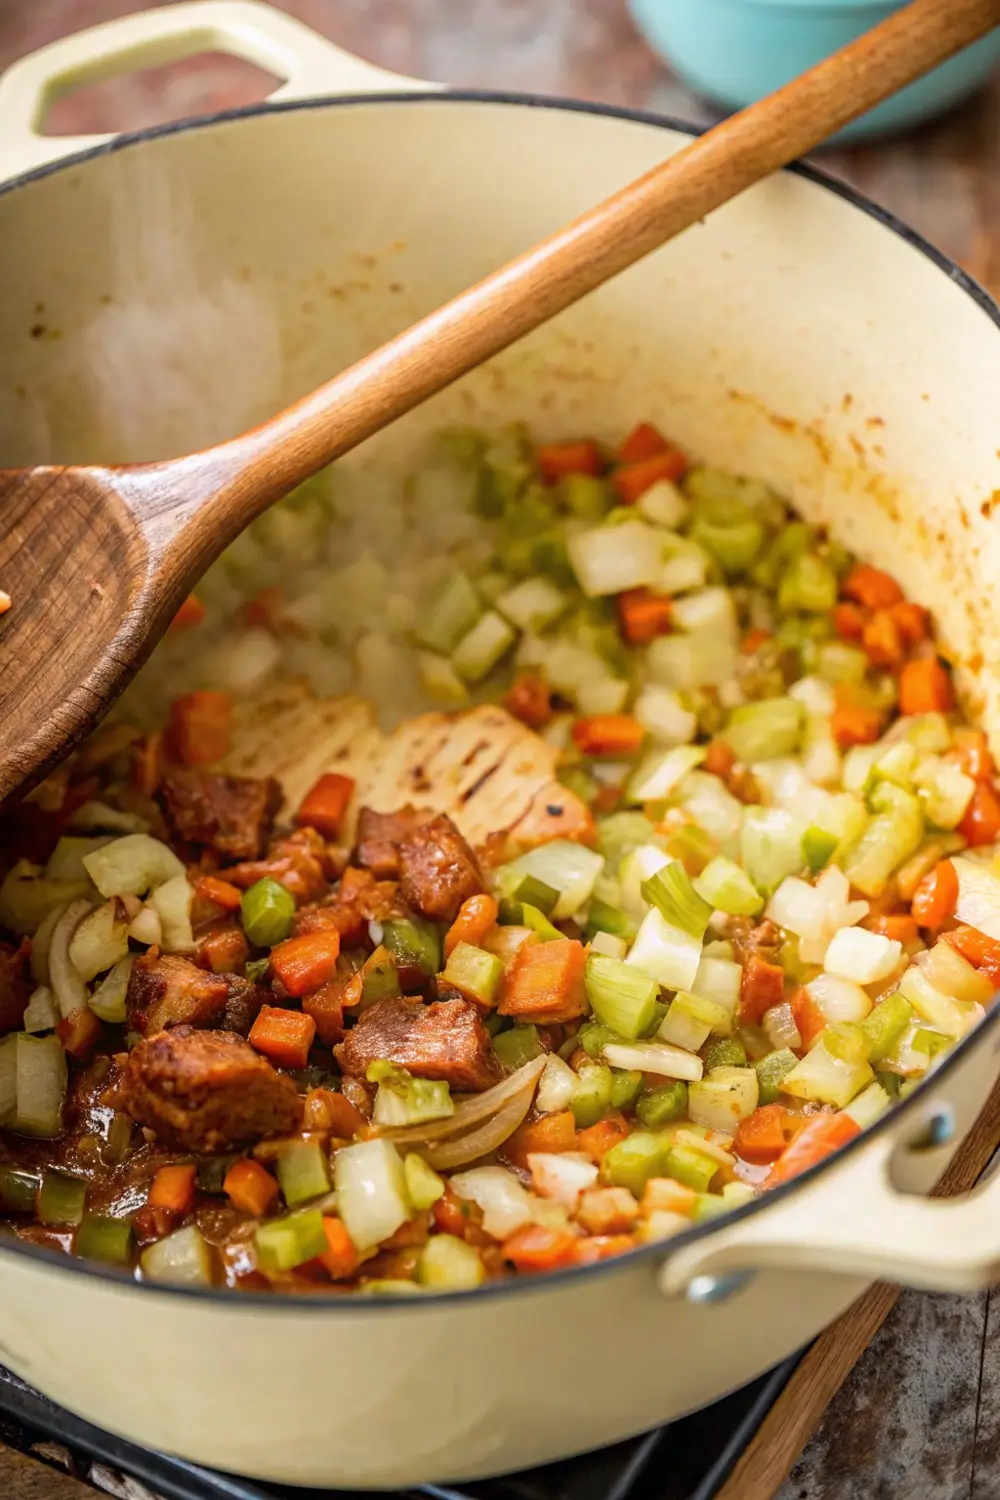
Building Flavor
Pull the steaks out, set them aside. Now toss in chopped onions, celery, carrots. I don’t measure this stuff to be honest—one big onion, two or three ribs of celery, three medium carrots. And I don’t dice everything super fine either. Just rough chop it. These vegetables are gonna cook for two hours so they’ll fall apart anyway, and I actually like seeing chunks of carrot on my plate.
Let everything soften and start to brown, maybe eight or nine minutes. Stir it occasionally. You’ll have to scrape the bottom of the pan some—that’s good, you’re picking up all that stuck-on flavor. When the onions are soft and starting to caramelize, add some minced garlic. Four cloves? Five? Doesn’t really matter. Cook it just til you smell it, maybe a minute.
Now here’s the key move: tomato paste. Three tablespoons or so. Dump it in and cook it, stirring pretty much constantly, til it darkens and smells different. It’ll want to stick to the pan a little—let it. You’re looking for it to go from bright red to kind of a dark brick red, and the smell should go from sharp and acidic to almost sweet. Takes maybe three minutes. Maybe four if your heat’s lower. You’ll know when you smell it.
Pour in two cups of stock. Beef is traditional and it’s what I use, but chicken works if that’s what you have. Add a couple good glugs of Worcestershire—maybe two tablespoons—and throw in a bay leaf. Thyme sprigs if you’ve got them but I usually don’t. Stir it all together, scraping up everything stuck to the bottom.
It won’t look like much yet. Kind of thin and watery. That’s fine, it’ll thicken up.
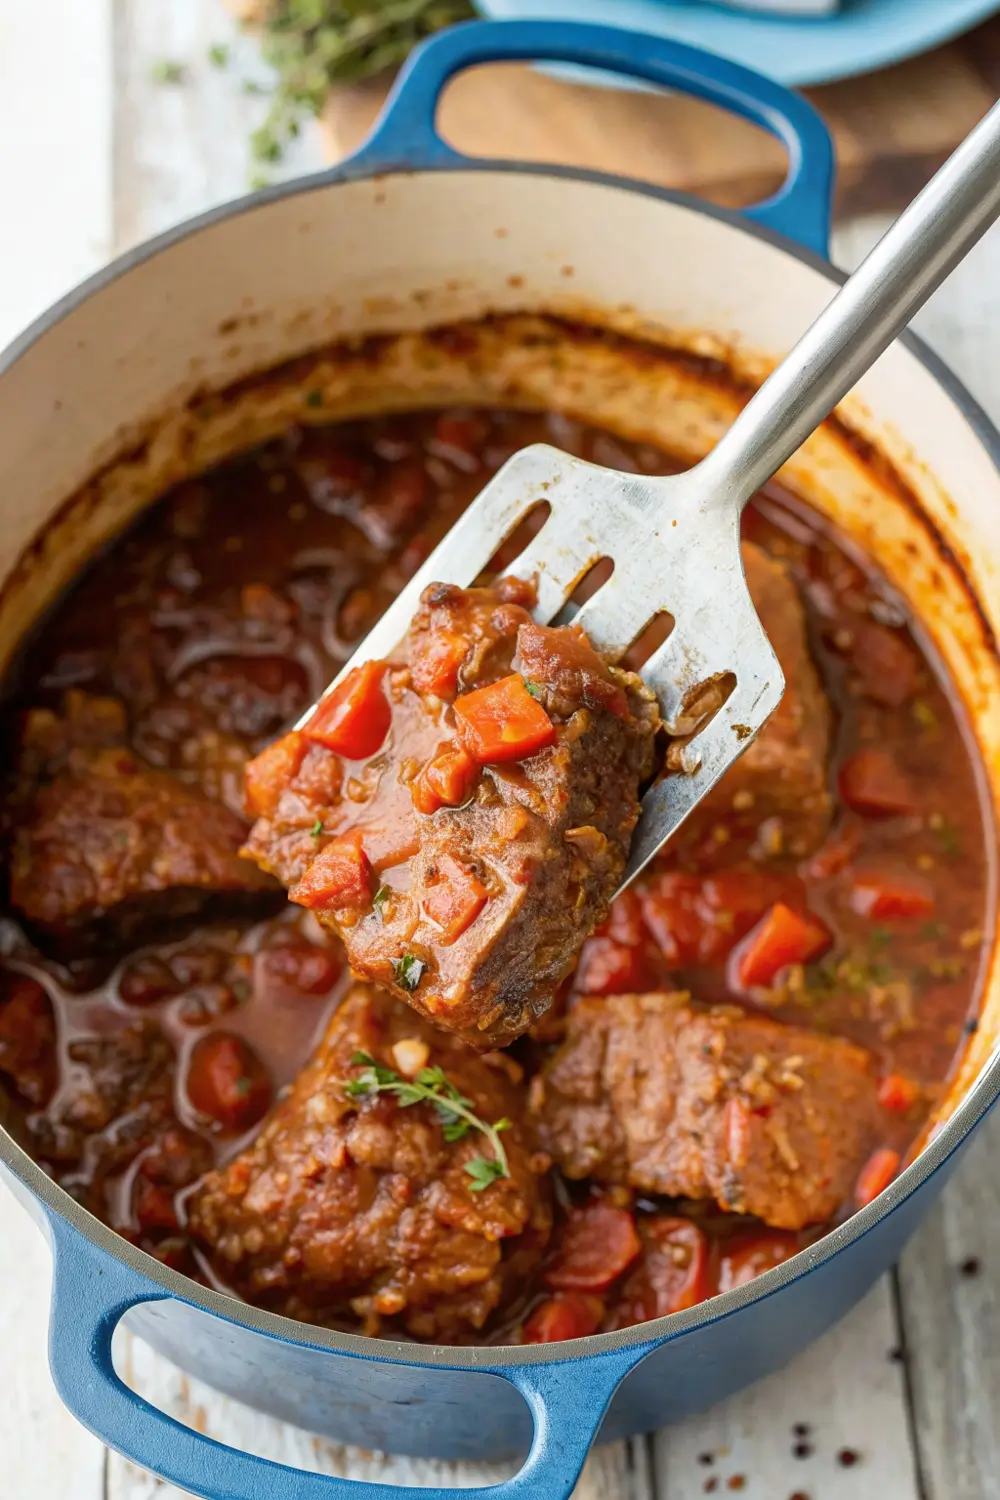
The Long Wait
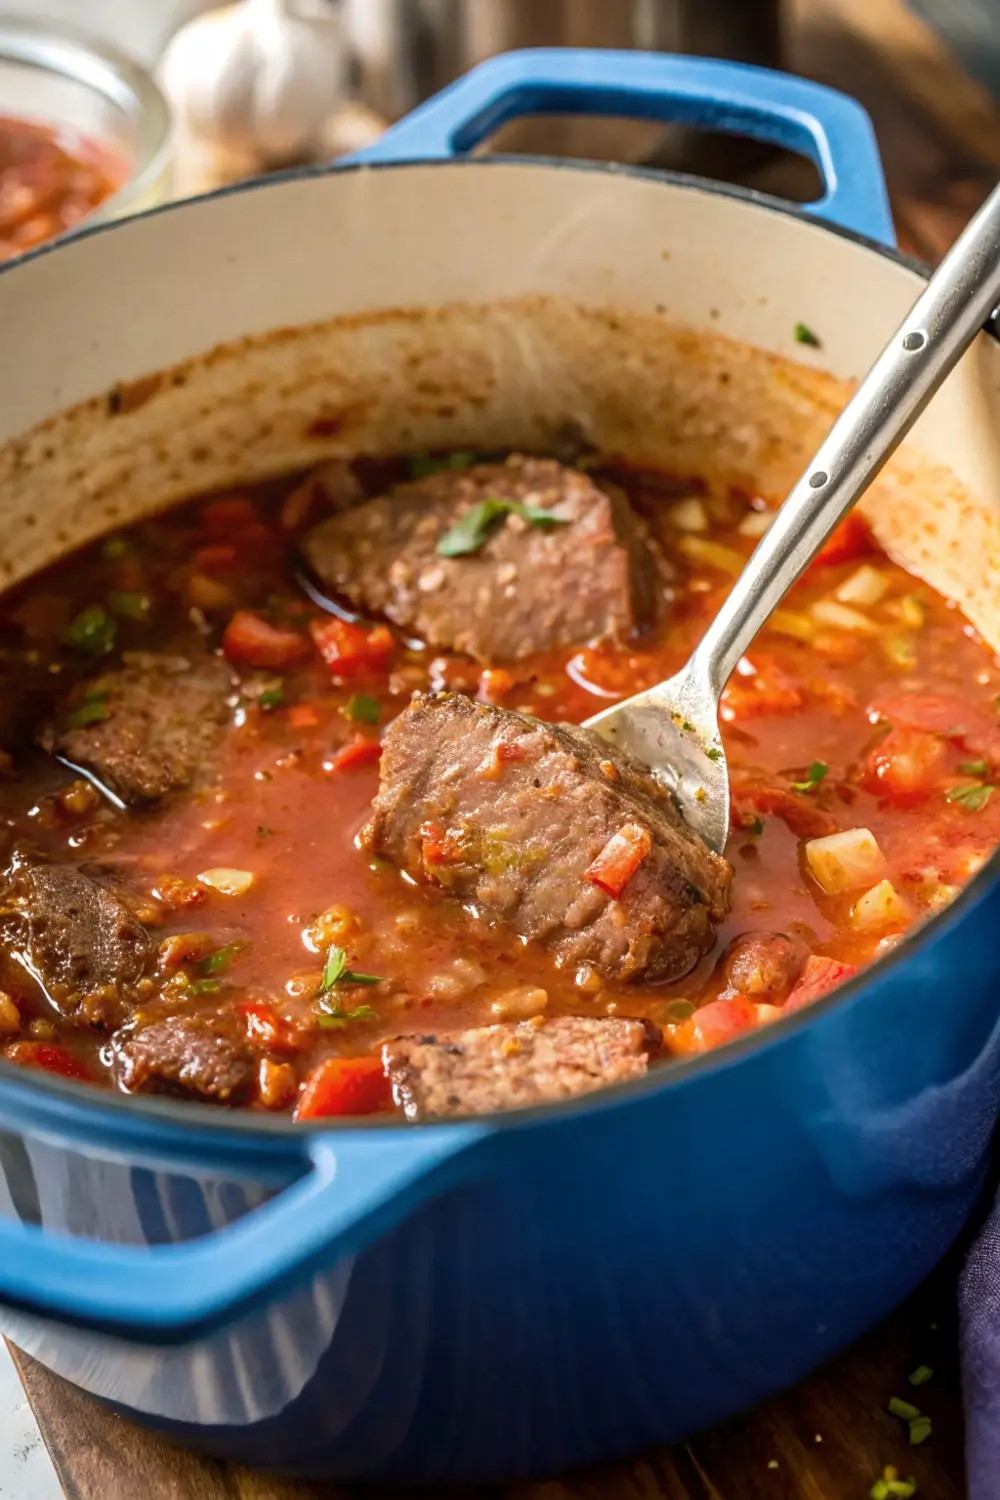
Put the steaks back in the pan. Turn them around so they get coated in everything. Put it on the stove over medium heat til you see a few bubbles starting to come up from the bottom, then cover it tight and stick the whole thing in a 325-degree oven.
And now you wait.
Two hours.
I know that sounds like forever. But here’s what’s happening in there: that tough collagen in the meat is slowly dissolving into gelatin. The vegetables are breaking down and sweetening everything. The flavors are melding together. Your house starts to smell so good you’ll want to open the oven and check it every five minutes but don’t do that, you’ll let all the heat out.
After about an hour and a half, check it. Stick a fork in one of the steaks and press down. It should give pretty easily, like it’s gonna fall apart if you push much harder. If there’s still resistance—if it feels firm or springy—give it another half hour.
Temperature-wise you’re looking for around 200-205 degrees inside the meat, which is way hotter than you’d ever cook a steak on the grill. But that high temperature over a long time is what breaks everything down. Here’s the thing though—temperature isn’t the best way to judge if it’s done. The fork test is better. If the meat’s dry or tough when you pull it out, it actually probably needed more time, not less. I know that sounds backwards but trust it.
Kowalski told me the biggest mistake people make is not cooking it long enough. “They see two hours and think that’s gonna dry it out. It’s the exact opposite. If your Swiss steak’s dry, it needed more time.” She’s made this dish probably a thousand times at this point so I believe her.
Eating It
When it’s done, take it out and let it sit for ten minutes or so. Not totally necessary but it gives the gravy time to settle and thicken up instead of just running all over the plate.
Serve it over mashed potatoes. That’s how my grandmother did it and that’s how it should be. You could do rice or egg noodles I guess, but mashed potatoes is the move. Make that crater in the potatoes and pour extra gravy over the whole thing.
Those vegetables that cooked with the meat? Eat them. They’re not just there to look pretty. They’re soft and sweet and soaked in tomato gravy and they’re basically a built-in side dish.
This is the kind of food that fills you up and sticks with you. Nothing fancy about it. Cheap cut of meat, basic vegetables, couple hours in the oven. But done right it’s better than a lot of the expensive stuff you’d get at a restaurant.
My grandmother’s been gone about eight years now. But every time I make this on a Thursday I can hear that sound—thwack, thwack, thwack—and smell that kitchen and feel like I’m eleven years old again sitting at her table.
Anyway. Here’s how to make it.
What You Need
- 2 pounds round steak (top, bottom, or eye)
- Salt
- Black pepper
- Half a cup of flour
- 3 tablespoons vegetable oil
- 1 big yellow onion
- 2 or 3 ribs of celery
- 3 medium carrots
- 4-5 cloves garlic
- 3 tablespoons tomato paste
- 2 cups beef stock (chicken works too)
- 2 tablespoons Worcestershire
- 1 bay leaf
- Thyme if you have it
How To Do It
- Turn your oven to 325.
- Cut the round steak into four pieces, each about three-quarters inch thick. Get out your meat mallet—spiked side—and pound each piece til it’s about half an inch thick and looks thoroughly beat up. Season both sides with salt and pepper.
- Put the flour in a shallow dish or plate. Drag each steak through it, shake off the extra.
- Heat the oil in a Dutch oven or other heavy pan over medium-high heat til it shimmers. Add the steaks—do it in batches if they don’t all fit—and don’t touch them for 3-4 minutes per side. You want them really dark brown. Take them out and set them aside.
- Turn the heat down to medium. Throw in the chopped onion, celery, and carrots. Add a good pinch of salt and pepper. Let it cook, stirring now and then, til the onion softens and starts to brown. Eight minutes, maybe nine.
- Add the garlic. Stir it around for a minute til you can smell it.
- Add the tomato paste. This is important: cook it, stirring basically the whole time, til it gets darker and smells toasted instead of sharp. About 3 minutes, maybe longer. It’ll want to stick to the pan—that’s fine.
- Pour in the stock and Worcestershire. Throw in the bay leaf and thyme. Stir everything together, scraping up all the stuck bits from the bottom of the pan.
- Put the steaks back in. Turn them to coat them in sauce. Bring it up to where you see a few bubbles, then cover the pan tight and put it in the oven.
- Leave it alone for two hours. Start checking after 90 minutes by sticking a fork in—should feel like it’ll fall apart. If it’s still firm, give it more time.
- When it’s done, let it sit for ten minutes. Fish out the bay leaf. Taste the gravy and add more salt or pepper if it needs it.
- Serve over mashed potatoes. Spoon extra gravy over everything.
What You’ll Need Equipment-Wise
Meat mallet with spikes. Dutch oven or some kind of heavy pan with a lid that can go in the oven.
Leftovers
It’s actually better the next day. The flavors settle into each other or something, I don’t know. Let it cool down then stick it in the fridge, keeps for four days easy. When you reheat it the gravy’ll be thick—add a splash of stock or even just water to thin it out if you need to.
Advertisements
Love this recipe? Join Lady's Universe Club.
Subscribe


Leave a Reply