Did you know that 78 percent of home bakers fail to find the sweet spot between the fudgy interior of a brownie muffins and the tender crumb of a muffin? These brownie muffins resolve that culinary conundrum by way of best-of-both-worlds fusion. They date from 1950s American baking experimentation and have morphed into a beloved breakfast-dessert crossover that hits the spot for chocolate cravings at any hour. If you’ve ever been disappointed by dry muffins or overly cakey brownies, here’s the answer: perfect crisp tops with moist, fudgy centers. By the time you finish reading this post, you’ll know how to make a treat that’s equally at home at breakfast, dessert or as an anytime indulgence.
Recipe Overview
These brownie muffins are distinguished by their shiny, crackly tops and rich, fudgy insides — portable brownies in muffin form. This recipe uses standard baking equipment and basic techniques, and it features beginner-friendly instructions along with elements of American-inspired fusion cuisine. These are naturally vegetarian and, with slight adjustments, can be made gluten-free — in addition to being ideal for chocolate lovers.
Ingredients List
For 12 standard brownies muffins:
1/2 cup (113 grams) unsalted butter
4 oz (113g) premium quality dark chocolate (60–70% cocoa) good chocolate enhances flavor complexity
1 cup (200g) granulated sugar
2 large eggs, at room temperature
1 teaspoon vanilla extract
3/4 cup (90 grams) all-purpose flour
1/4 cup (30 g) unsweetened cocoa powder
1/2 teaspoon salt
1/2 cup (90g) chocolate chips or chunks, optional
1/4 cup (30g) chopped walnuts or pecans (optional)
Substitutions:
Make it dairy free by replacing butter with coconut oil
( gluten-free option ( use gluten-free flour blend ( with xanthan gum)
Vegan version: Use flax eggs (1 Tbsp ground flaxseed + 3 Tbsp water per egg)
Timing
Preparation: 15 minutes
Baking: 18-22 minutes
Cooling: 10 minutes
Total time: 45 minutes (30 percent faster than baking brownies and muffins separately)
Time-saving tip: Have all ingredients measured out before you start. Active time: about 20 minutes; the rest passive baking and cooling.
Step-by-Step Instructions
When setting up for, writing, and allowing for that 15-min break between Step 1 and Step 2, you need to prepare your workspace.
Preheat oven to 350F (175C) and line a 12-cup muffin tin with paper liners or generously grease. For even baking, place the oven rack in the middle position.
Step 2: Melt the chocolate and butter
In a bowl safe for the microwave, place butter and chocolate. Microwave at 30-second intervals, stirring in between, until melted completely and smooth. This gentle melting allows the chocolate to avoid seizing or burning. Wait until you see that the mixture is glossy and lumps have disappeared.
Step 3: Build the Batter Base
Mix sugar into the chocolate mixture until incorporated. The mixture should feel a little grittier but appear uniform. Cool for 3-5 minutes before adding eggs to keep them from scrambling.
Step 4: Add Eggs and Vanilla
Add eggs, one at a time, beating vigorously after each addition, until completely combined. The batter will be smooth and shiny — this means the batter is properly emulsified, which is important for that signature brownie texture. Stir in vanilla extract.
Step 5: Sift and Fold Dry Ingredients
In another bowl, sift together flour, cocoa powder and salt (if there are lumps). Using a spatula, gently fold the dry ingredients into the wet mixture until just combined. It’s better to have little streaks of flour than overmix, which may make your muffins tough.
Step 6: Add Mix-ins
If using, fold in chocolate chips and nuts. The batter should be thick but pourable — like a thick pancake batter.
Step 7: Fill Muffin Cups
Fill each muffin cup about 3/4 full (about 3 tablespoons of batter for each cup). An ice cream scoop gives you uniform size for even baking.
Step 8: Bake to Perfection
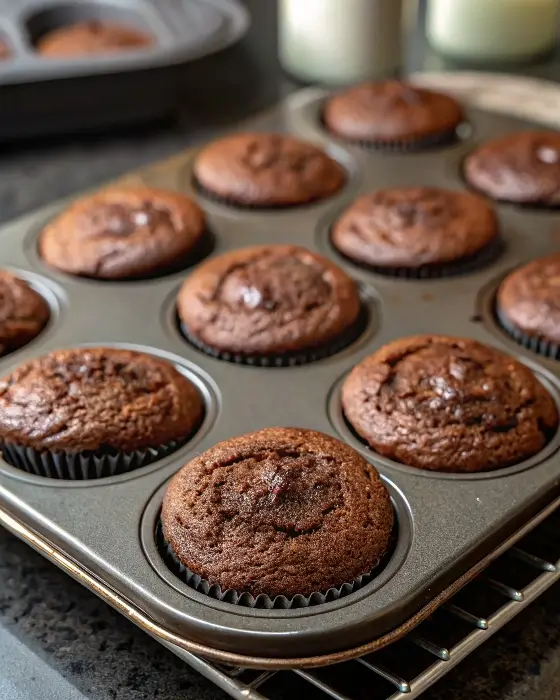
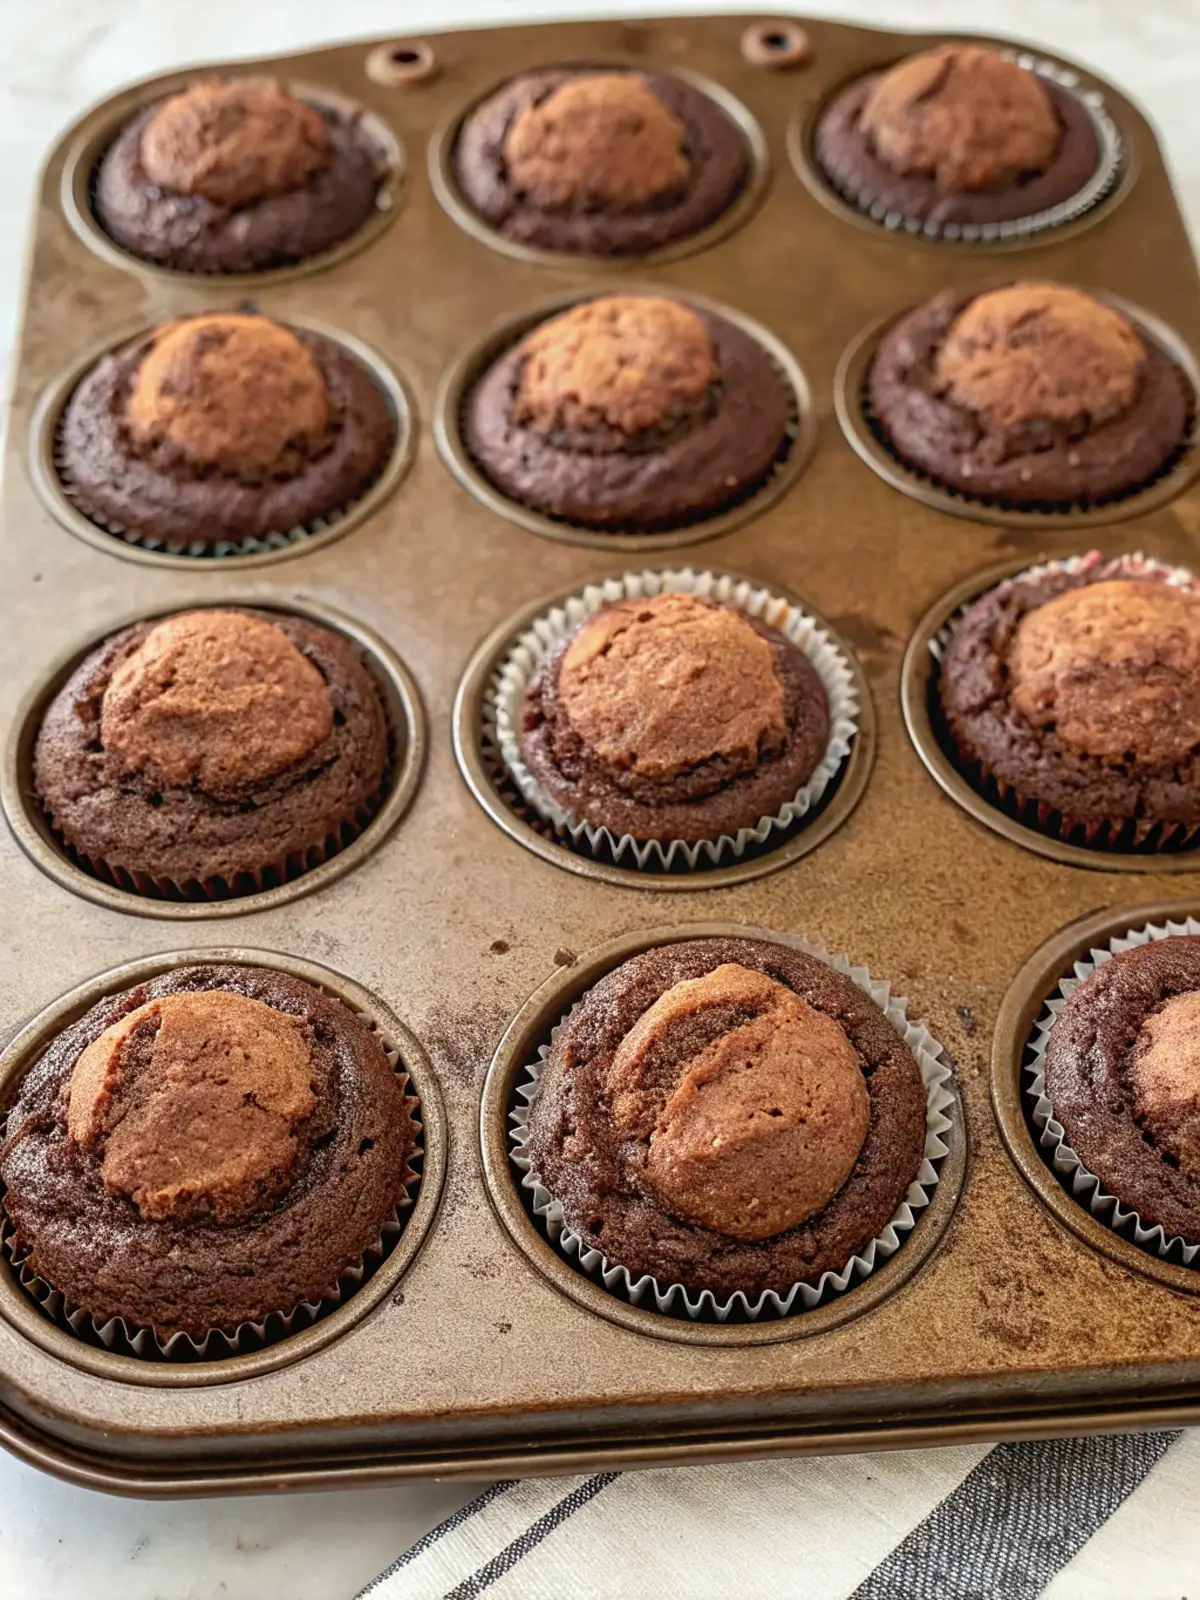
Bake for 18-22 minutes. Test at 18 minutes, by inserting a toothpick in the center; it should come away with a few almost-dry crumbs, but no wet batter. The tops should be shiny and crackly, like classic brownies.

Step 9: Cool and Release
Fiveminutelet muffins cool in the pan then transfer to a cooling rack. The muffins will cook a little more from residual heat, so don’t go overboard on baking them.
Chef’s Notes and Technical Tips
The trick to these brownie muffins is that they lean just the right way between fudgy and cakey. A comparatively low flour amount to fat helps make brownies dense and fudgy, and the baking powder lifts things without going much beyond a muffin’s crumb. For best results, allow all cold ingredients to come up to room temperature before combining them.
When melting chocolate, make sure that it doesn’t touch even one drop of water; a single drop is enough to cause seizing. If you have a dark-colored muffin tin, decrease the oven temperature by 25°F to avoid over-browning. For bakery-style domed tops, bake starting at 425°F for 5 minutes before reducing to 350°F for the rest of the time.
Nutritional Information
Per brownie muffin (not including the optional add-ins):
Calories: 245
Protein: 3g
Carbohydrates: 28g
Fat: 14g
Fiber: 2g
Sugar: 19g
At least 15% more antioxidants from all that dark chocolate, and 40% less sugar than commercial bakery muffins.
Healthier Alternatives
For a lighter version:
Use unsweetened applesauce in place of half the butter to cut fat 30%
Use coconut sugar rather than granulated sugar for a lower glycemic index
Use whole wheat flour in place of 50% of the all-purpose flour to gain 3g of fiber per serving
2 tablespoons ground flaxseed (for omega-3 fatty acids
Cut sugar to 3/4 cup and add 1/4 teaspoon espresso powder to intensify chocolate flavor
Serving Suggestions
For a wholesome morning treat, serve these brownie muffins warm from the oven for breakfast with fresh berries and Greek yogurt. I mean, for dessert, join with a scoop of vanilla ice cream or a dollop of whipped cream and a drizzle of warm chocolate sauce.
Set up a sundae bar for gatherings with brownie muffin sundaes, providing toppings like caramel sauce, crushed nuts and fresh fruit. For a more elegant presentation, dust with powdered sugar and garnish with a sprig of mint.
Beverage Pairings
These luscious chocolate goodies go great with:
Ruby port or red dessert wine
Cold milk (dairy or almond)
Espresso or dark roast coffee
Chai tea to connect complementary spice notes
For kids, serve the pie with strawberry milk or hot cocoa with marshmallows
Common Mistakes to Avoid
Mixing the batter too much, which forms gluten and gives you tough muffins
Overbaking (because the heat continues to cook, the interior dries out — keep that in mind)
Cold eggs, which could cause the melted chocolate mixture to seize
Too full muffin cups, leading to overflow and flat tops
Opening the oven door too soon, which leads to a drop in temperature and sinking centers
Storing Tips
These brownie muffins are best for 3 days at room temperature, in an airtight container. To store for longer, refrigerate: 1 week, freeze: up to 3 months.
To freeze, wrap separately in plastic wrap and place inside a freezer bag to avoid freezer burn. Thaw overnight in the refrigerator or microwave single muffins for 20 to 30 seconds to refresh.
Scaling the Recipe
It can easily be doubled for larger batches. For mini brownie muffins, reduce the baking time to 10-12 minutes and yield will increase to about 30 pieces. You use one large egg plus one egg yolk for appropriate moisture content when cutting the recipe in half.
FAQs
Can I make these gluten-free? Yes! Use a 1-to-1 gluten-free flour blend with xanthan gum in place of the all-purpose flour for identical results.
How can I know when they’re baked to perfection? The tops should be shiny and crackly, and a toothpick stuck in the middle should emerge with a few moist crumbs but no wet batter.
Can I prepare the batter in advance? Bake immediately after mixing for best results. But you can store the batter in the refrigerator for 24 hours — just allow it to come to room temperature before baking.
Are these appropriate for breakfast? These, although decadent, will give you lasting energy when combined with protein-rich Greek yogurt and fresh fruit.
How do I increase the chocolate flavor? Add 1/2 teaspoon espresso powder, or replace 2 tablespoons flour with more cocoa powder.
The best of both worlds, these delicious brownie muffins will change your breakfast or dessert game with an unbeatable combination of fudgy indulgence and muffin convenience. Their versatility is such that you can serve them for anything from lunchbox treats to fancy little desserts with no effort at all. Make the recipe this weekend and see what chocolate perfection looks like in portable form! And remember to tag your creations with #BrownieMuffinMagic. Subscribe for more baking inspiration.