Contents
- 1 Pop a peanut butter ball for an easy two-bite treat.
- 2 Ingredients:
- 3 Instructions:
- 4 Tips for the Best No-Bake Peanut Butter Balls:
- 5 FAQs.
- 6 1. Can I use natural peanut butter?
- 7 2. My chocolate is too thick for dipping. What can I do?
- 8 3. How can I make these look more professional?
- 9 4. Can I make these ahead of time?
- 10 Serving Suggestions:
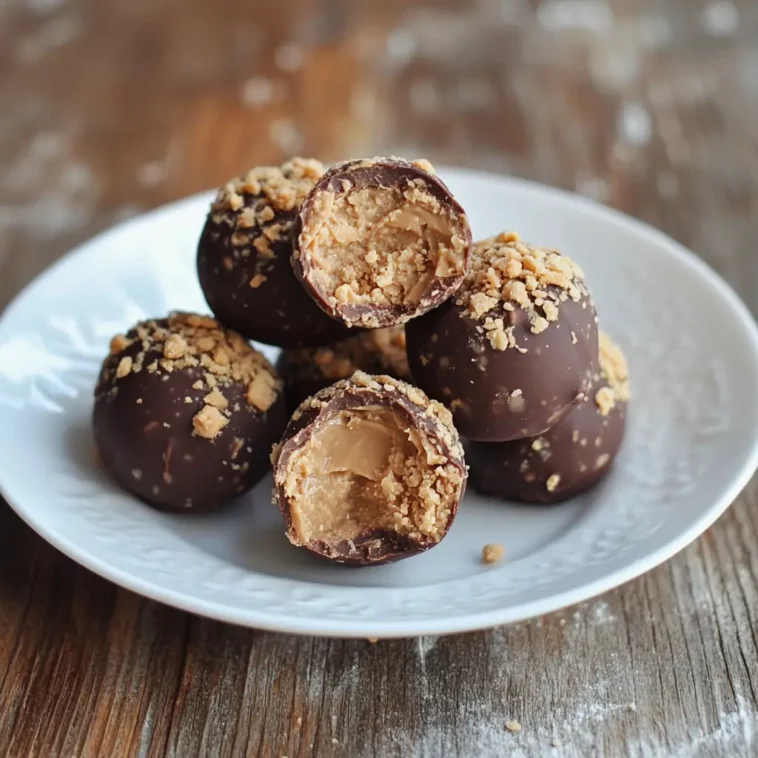
Pop a peanut butter ball for an easy two-bite treat.
I envisioned leftovers from the holiday party, where I brought these no-bake peanut butter balls. Oh, how wrong I was! The whole platter was empty within minutes, and I was bombarded with questions for the recipe. One of the friends sneaked some into her bag, claiming “for later,” but I doubt they made it home. Since then, I use these little peanut butter bites covered in chocolate for potluck parties, holiday cookie trays, and last-minute edible gifts. I can whip up a batch of these chocolate-covered peanut butter balls in just 15 minutes, making it seem like nothing.
If you enjoy the sweet and savory combination of peanut butter and chocolate, you’ll be making these bites all the time. The biscuit base contains creamy peanut butter, powdered sugar, and a secret ingredient, the crushed graham cracker, which adds the right balance to the biscuit base. A bit of butter helps all of the ingredients to meld into a dough. After putting peanut butter balls in shapes of little balls, chill the peanut butter balls, then melt chocolate and cover the balls with melted chocolate. Most importantly, these are no-bake. So they are a no-fuss, no-fail dessert you can make anytime.
Equipment You’ll Need:
- Large mixing bowl.
- Silicone spatula or wooden spoon.
- Baking sheet.
- Parchment paper or silicone mat.
- Double boiler or microwave-safe bowl.
- Two forks or dipping tools for coating.
Ingredients:
- 1 cup crushed graham crackers (which refers to about 9 of them; see notes).
- 1 cup smooth peanut butter (see notes).
- 1 cup powdered sugar.
- A quarter cup of unsalted butter.
- 8 ounces semisweet baking chocolate should be noted.
Instructions:
- In a large mixing bowl, you will combine the graham cracker crumbs with peanut butter, powdered sugar and butter. Stir until fully blended and smooth. The mixture should be firm but pliable, like cookie dough.
- Using a teaspoon or small cookie scoop, roll the mixture into balls of even size. Place them on a parchment-lined baking sheet. After arranging all the dough balls, place the baking sheet in the fridge for at least 30-minutes to chill.
- Melt the Chocolate: While the peanut butter balls are in the refrigerator, melt the chocolate. You can do this with the double boiler method (putting a heat proof bowl over a pot full of some water on simmer, then stirring until melted) or in the microwave (heating at 50% power in 30-second increments, stirring after each). Be careful not to overheat the chocolate.
- Take the chilled peanut butter balls and dip them into the melted chocolate with the help of two forks or a dipping tool. Let any leftover chocolate drip off, then put it back on the parchment-lined sheet.
- When all balls are coated, put the tray back in the fridge again to chill for an additional 30 minutes, until the chocolate is set.
- You can eat them straight from the fridge or store them. Keep them in an airtight container for up to two weeks in the refrigerator or for up to three months in the freezer if you want to store them.
Tips for the Best No-Bake Peanut Butter Balls:
- You may use smooth peanut butter, for amazing creamiest texture but chunky one also works well if you want a little crunch.
- You can also drizzle them with white chocolate or add sprinkles for an extra festive touch.
- To prevent burning, stir the chocolate often while it melts. If your chocolate begins to seize, add a small amount of coconut oil to smooth it out.
- For a health(ier) alternative, swap out powdered sugar for coconut sugar, blended into a powder, or reduce the sugar a little.
Variations:
Mix things up by using crushed rice krispies or rolled oats instead of graham crackers for a crunchy change.
Try replacing peanut butter with sunflower seed butter.
If you prefer darker chocolate, use dark chocolate instead of semi-sweet chocolate.
Spice it up: Include a pinch of cinnamon or nutmeg for a festive twist.
FAQs.
1. Can I use natural peanut butter?
Yes, but make sure it’s well-stirred and not too runny. If it’s too oily, it won’t hold together as well.
2. My chocolate is too thick for dipping. What can I do?
If the chocolate is too thick, add one teaspoon of coconut oil or vegetable shortening to thin it out for dipping.
3. How can I make these look more professional?
After you have dipped the balls, place them on a wire rack instead of parchment paper. This prevents a chocolate “pool” at the bottom. You can drizzle more chocolate over them once they’ve set.
4. Can I make these ahead of time?
Absolutely! You can keep them in the fridge for two weeks and in the freezer for three months. So, enjoy them or make ahead of time!
Serving Suggestions:
You can serve these on a cookie platter along with homemade fudge, truffles, or sugar cookies.
Put them in a fun tin or gift box for an easy homemade gift.
Try this with a cup of coffee or hot chocolate for a yummy dessert.
Crush them on ice cream for an easy sundae dessert.
These No-Bake Peanut Butter Balls are just the kind of treat that will disappear quickly, so don’t be shocked if you have to whip up another batch! They have the perfect balance of sweet, salty, and filled satisfying because of the combo of the chocolate shell and a peanut butter center. Also, they are very simple to make that kids can roll and dip them. If you want to a gift something or just had a craving for it that you will not regret baking that’s for sure. Grab your stuff, up your sleeves, and be prepared to make (and eat) the easiest homemade candy ever!